Listed below are the different tools that you can use to align shapes in PowerPoint:
Using the Align Tool
PowerPoint offers a dedicated Align tool to achieve perfect alignment with just a few clicks. Here’s how to use it:
Step 1: Select the shapes you want to align while holding down the ‘Shift’ key.
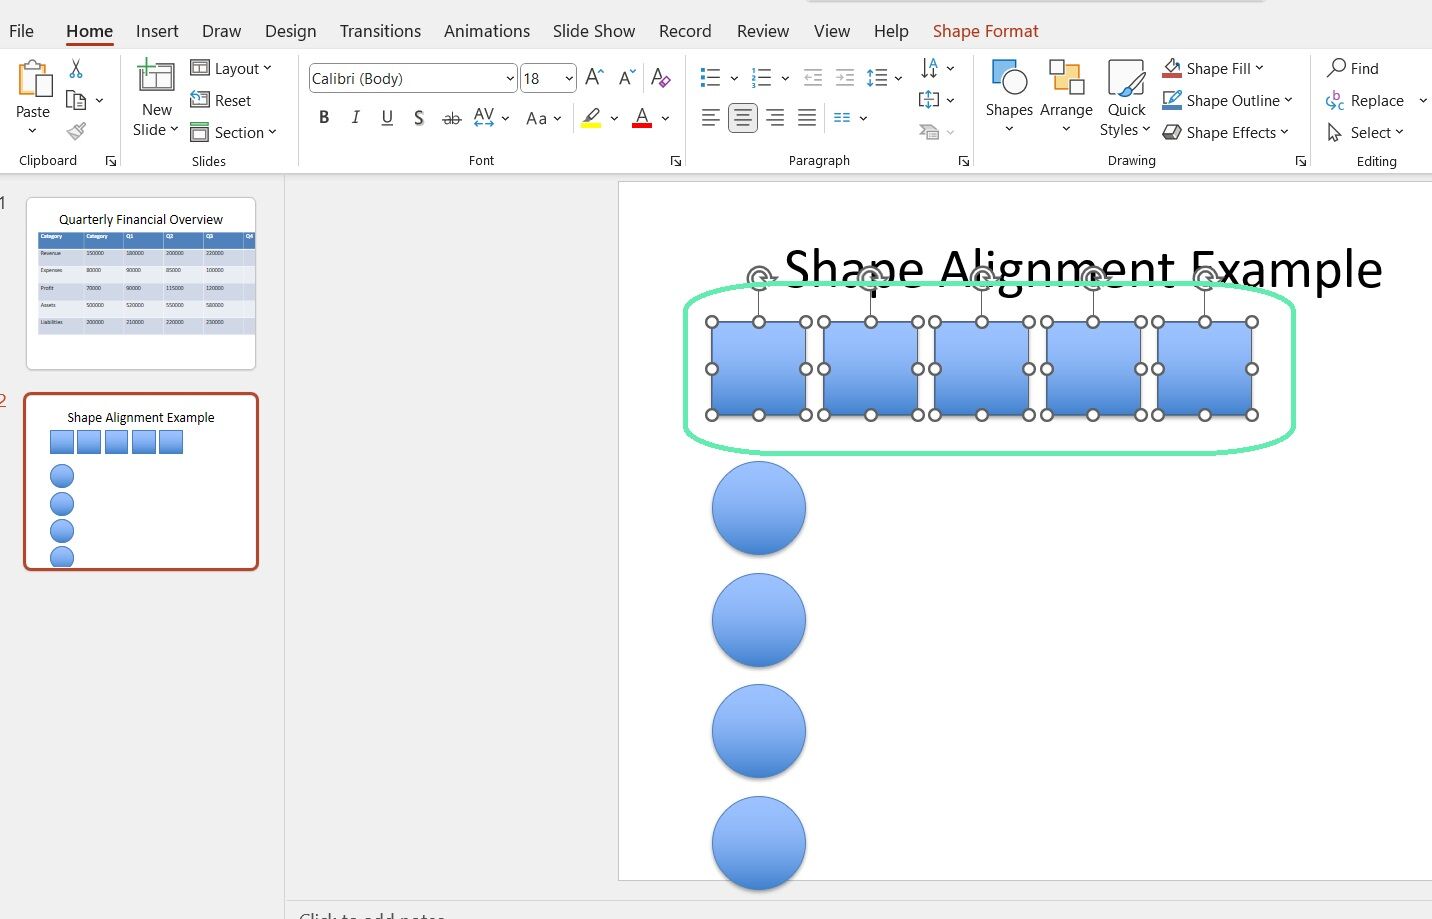
Step 2: Click the ‘Shape Format’ tab in the ribbon.
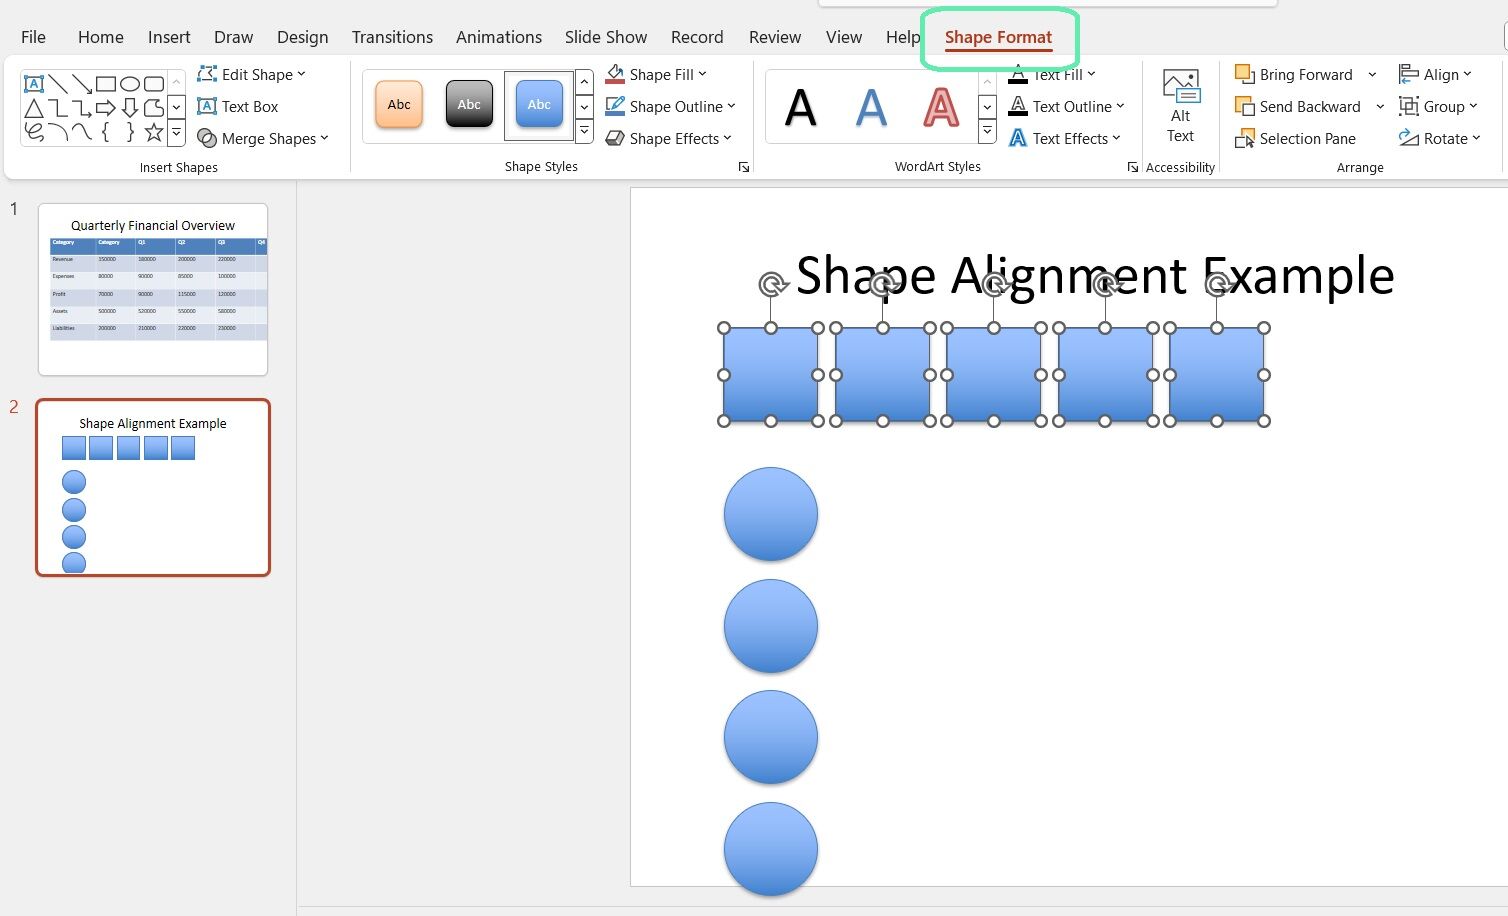
Step 3: In the ‘Arrange’ group, click the ‘Align’ button to open the dropdown menu.
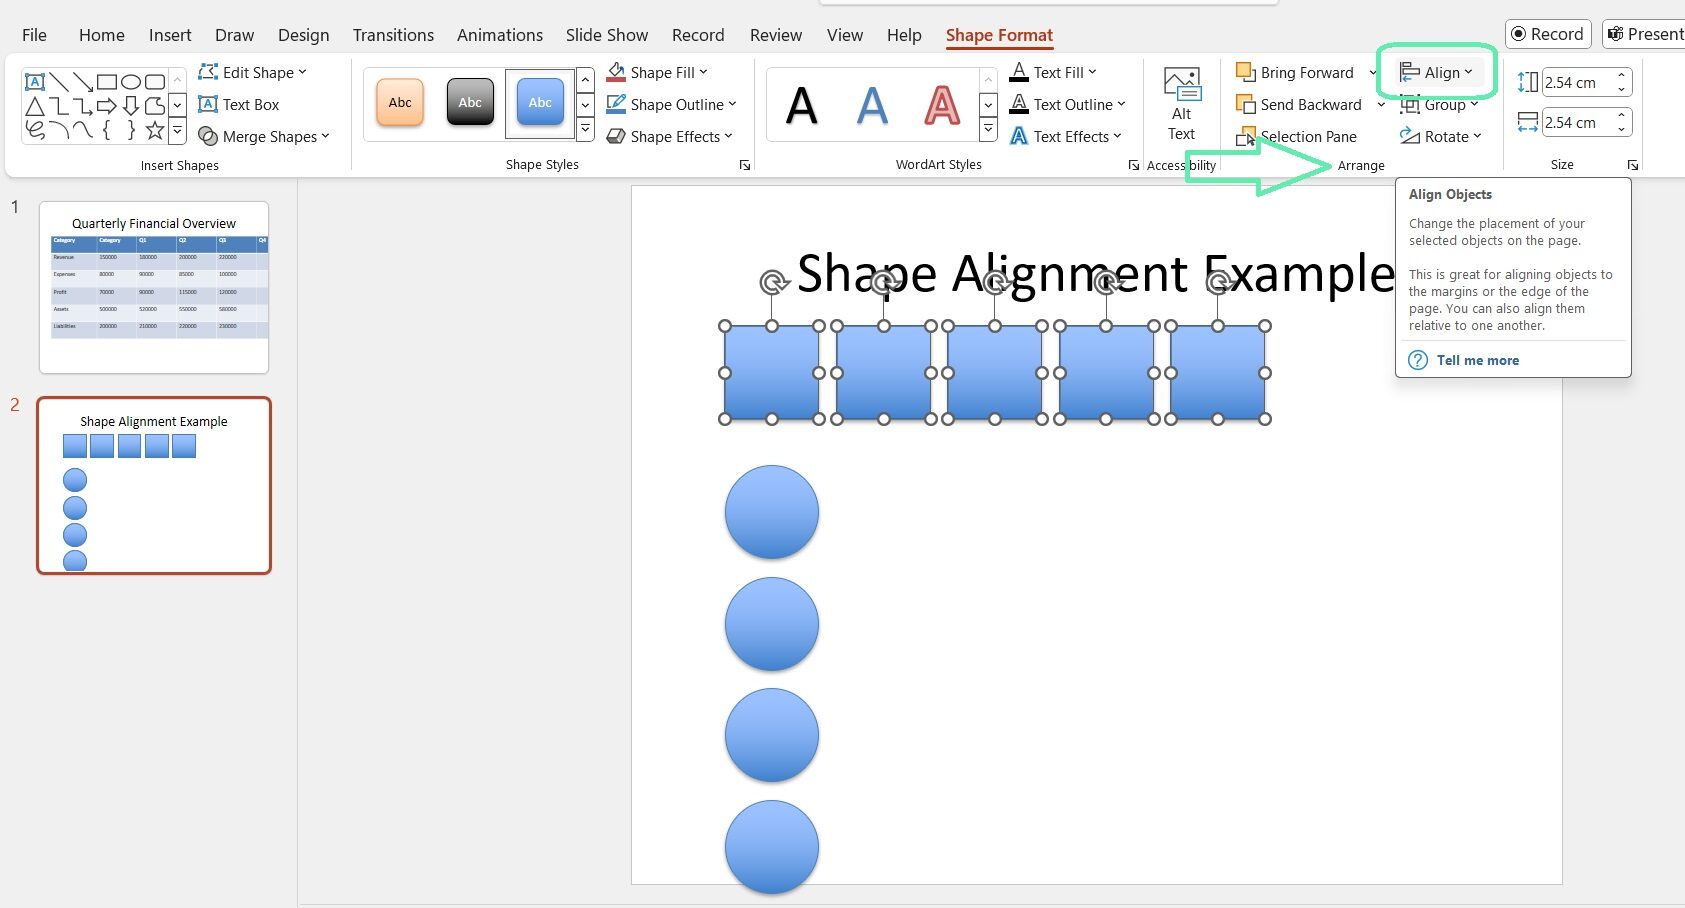
Step 4: Choose the desired alignment option (e.g., Align Left, Align Middle, Align Right).
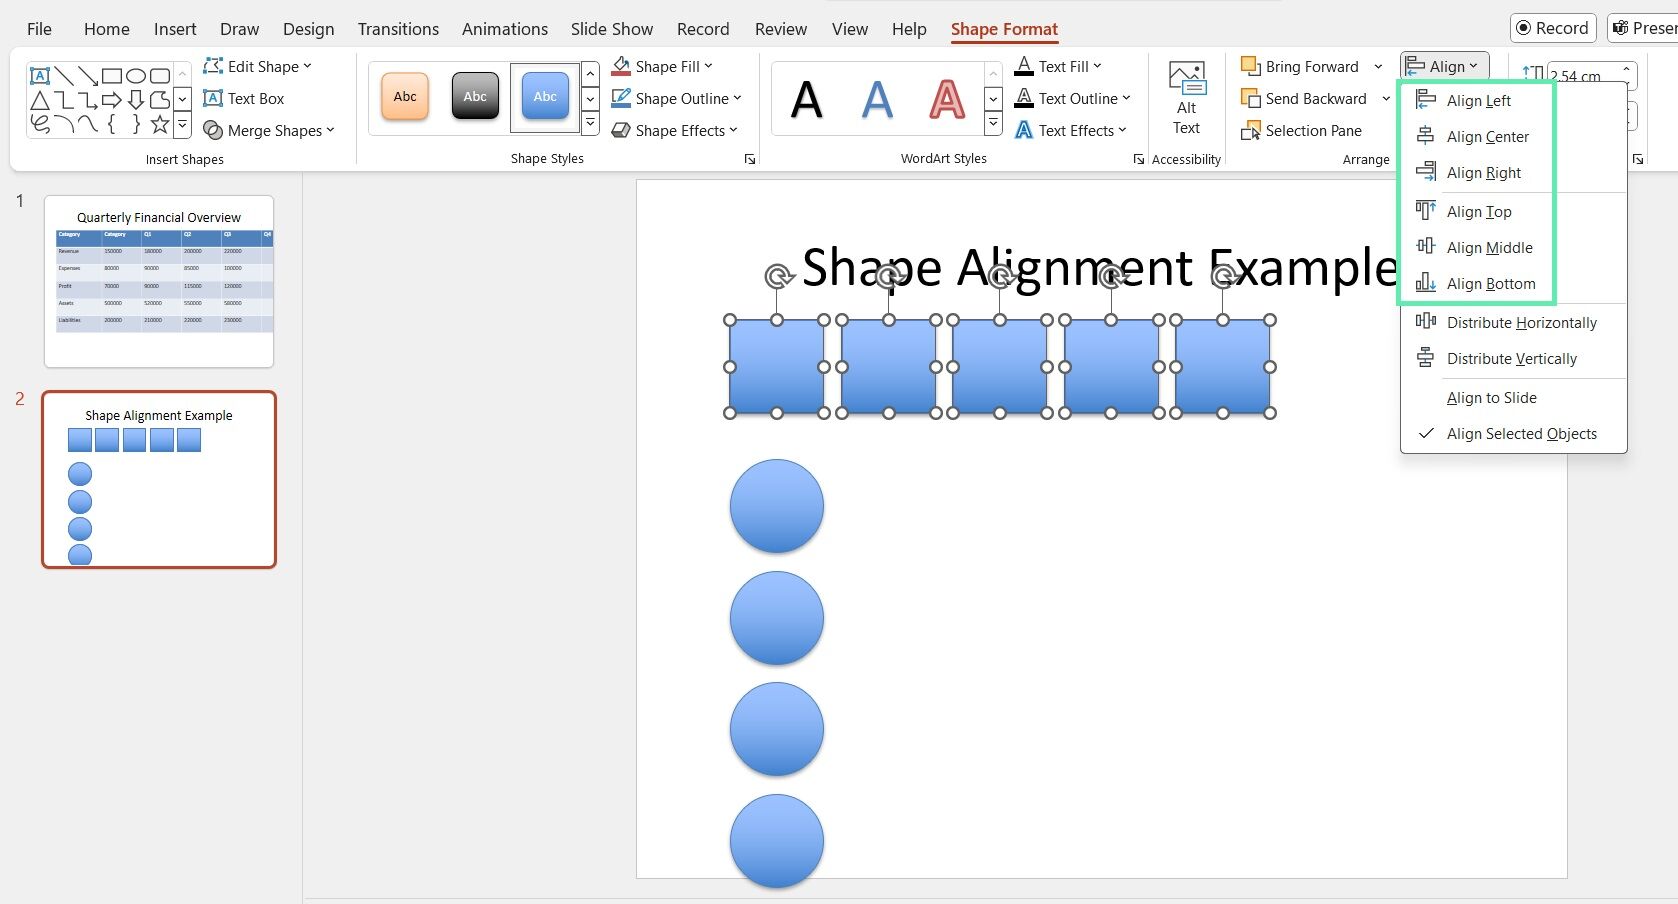
The selected shapes will snap into place based on your chosen alignment.
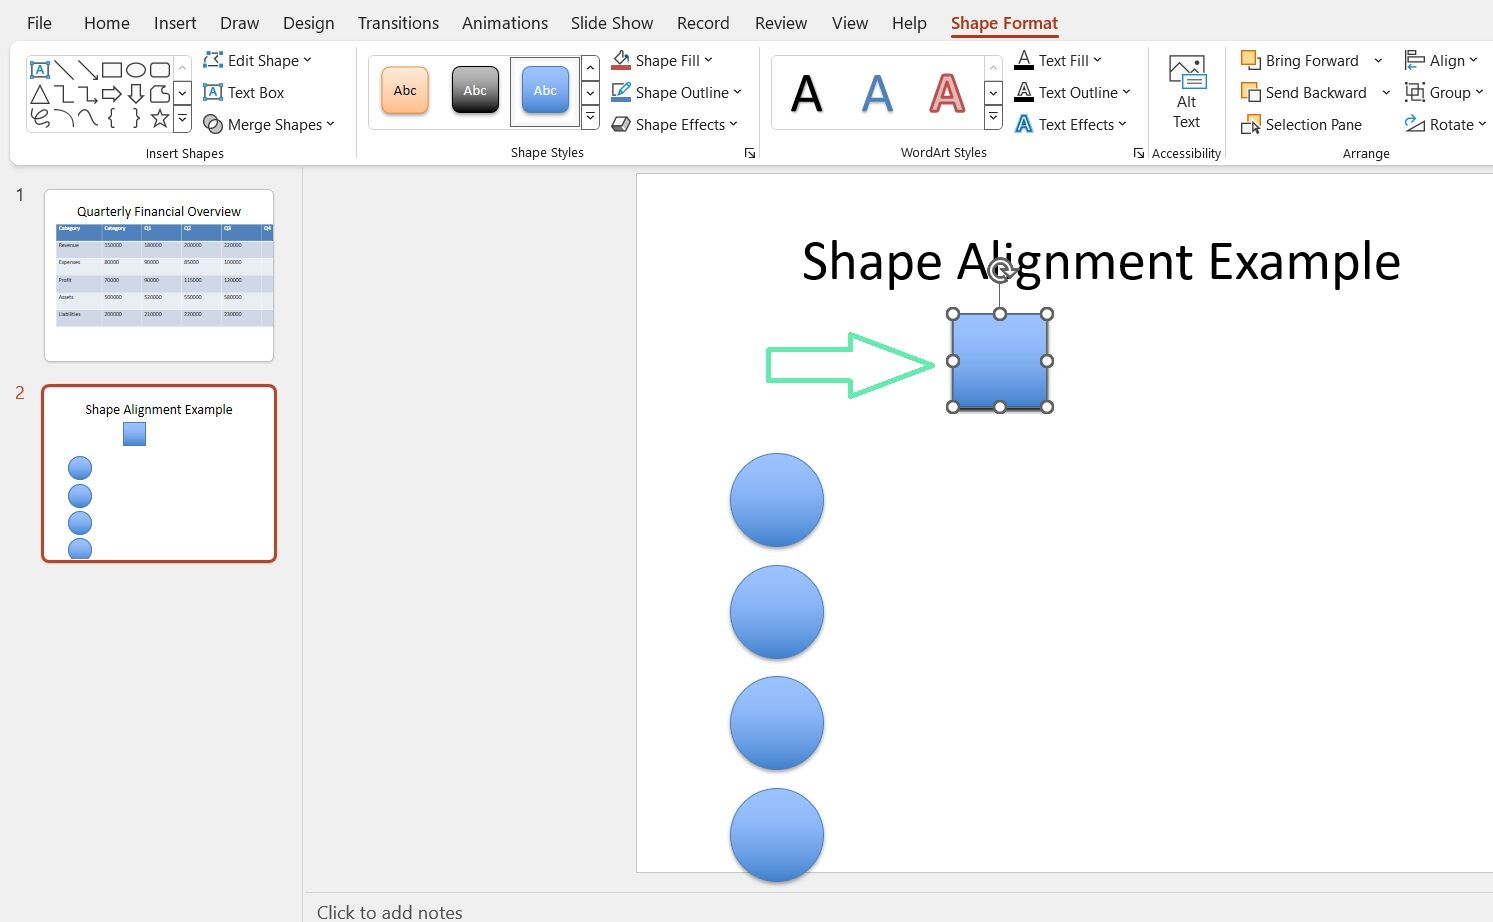
The Align tool helps align multiple shapes simultaneously, saving time and effort.
Aligning Shapes Using the Grid and Guides
Another way to ensure precise alignment is by using PowerPoint’s built-in grid and guides. The grid is a visual reference for placing shapes, while guides are customizable lines positioned anywhere on the slide to aid alignment.
To enable the grid and guides:
Step 1: Go to the ‘View’ tab in the PowerPoint ribbon.
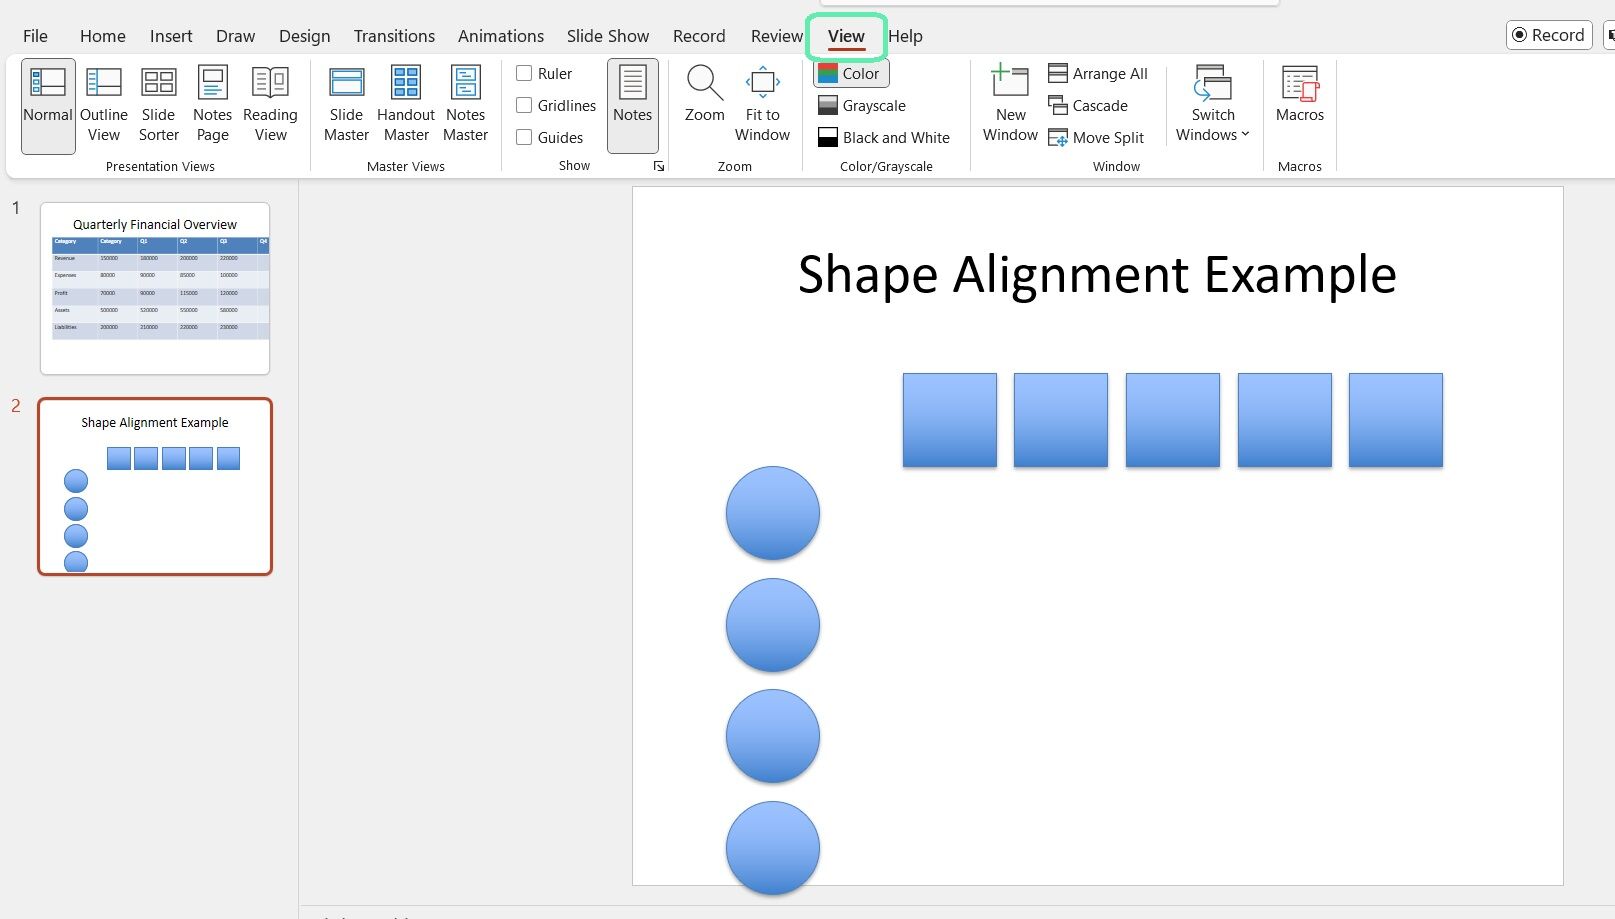
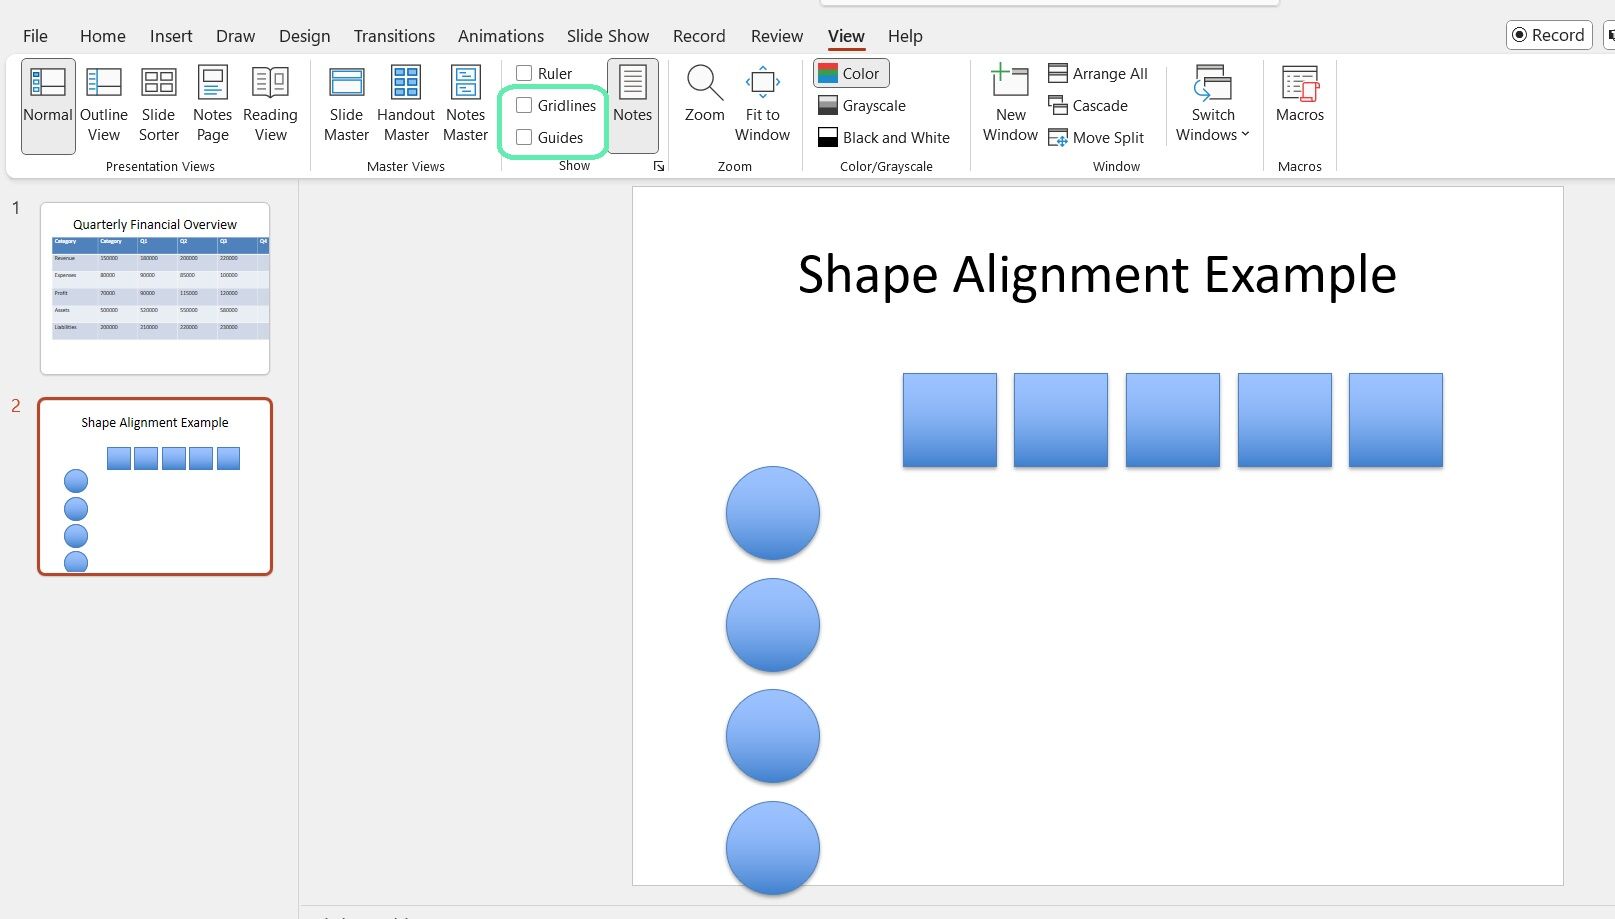
Step 2: In the ‘Show’ group, check the ‘Gridlines’ and ‘Guides’ boxes.
Step 3: To adjust the grid settings, click the ‘Gridlines’ dropdown arrow and select ‘Grid Settings’.
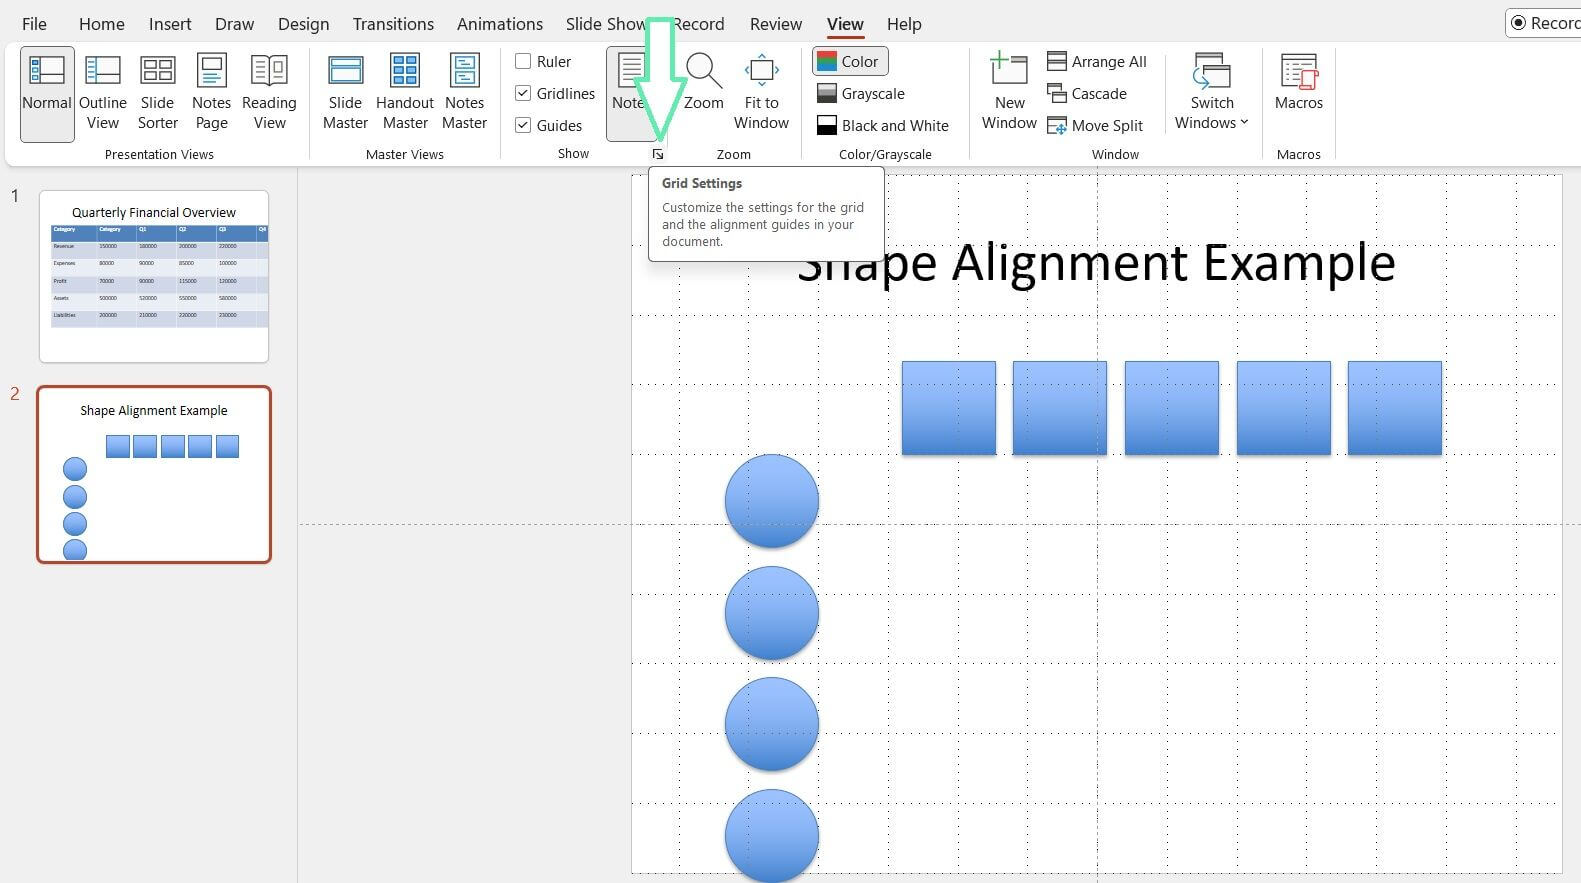
Here, you can customize the spacing and appearance of the grid.
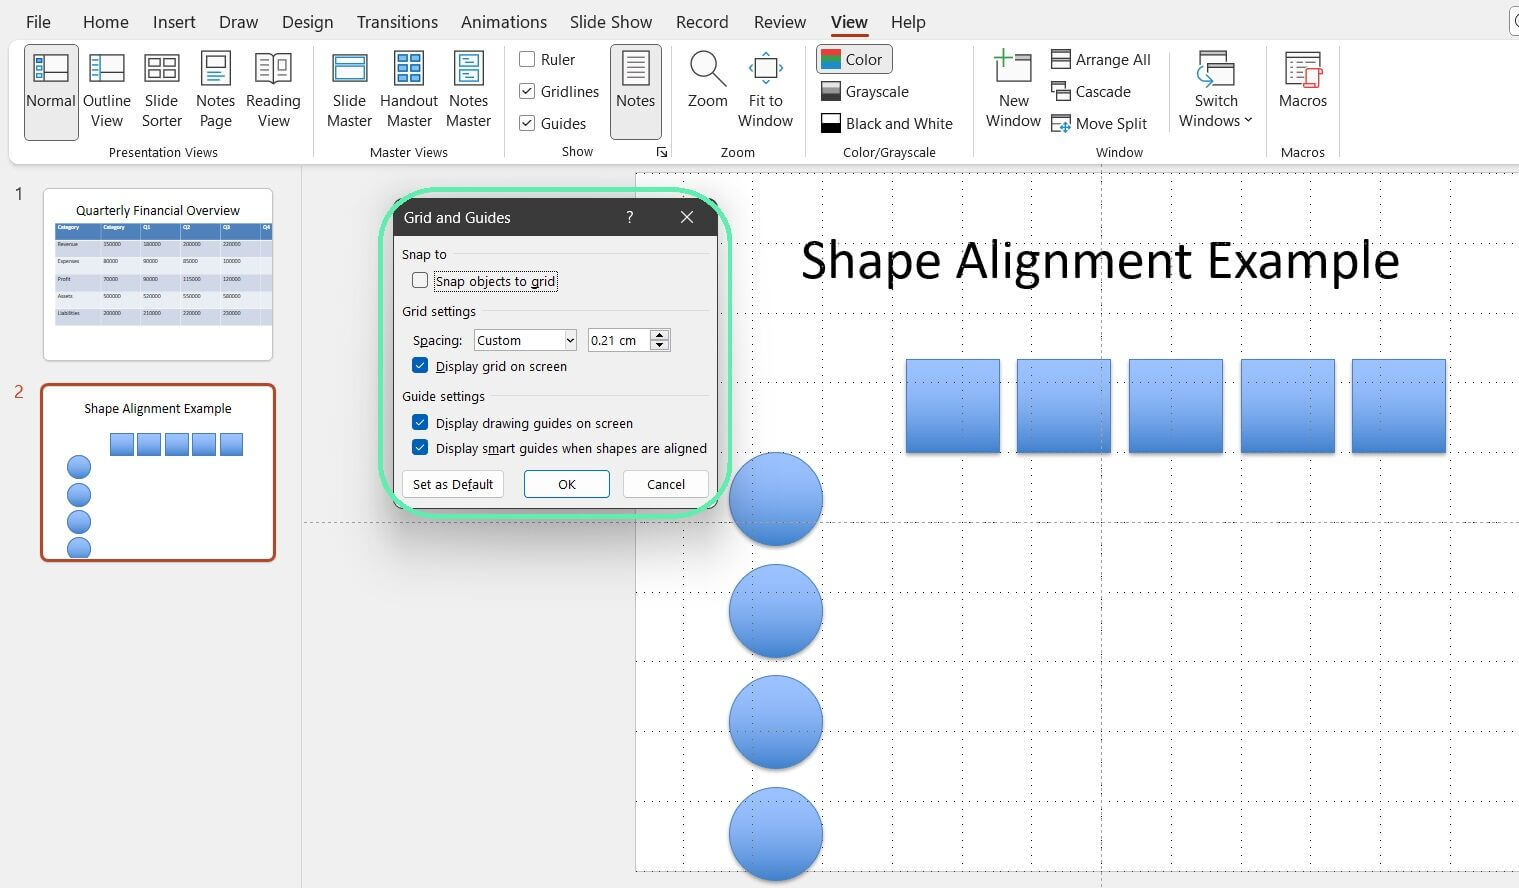
Step 4: To add a guide, click and drag from the ruler at the top or left side of the slide. You can reposition guides by clicking and dragging them to the desired location.
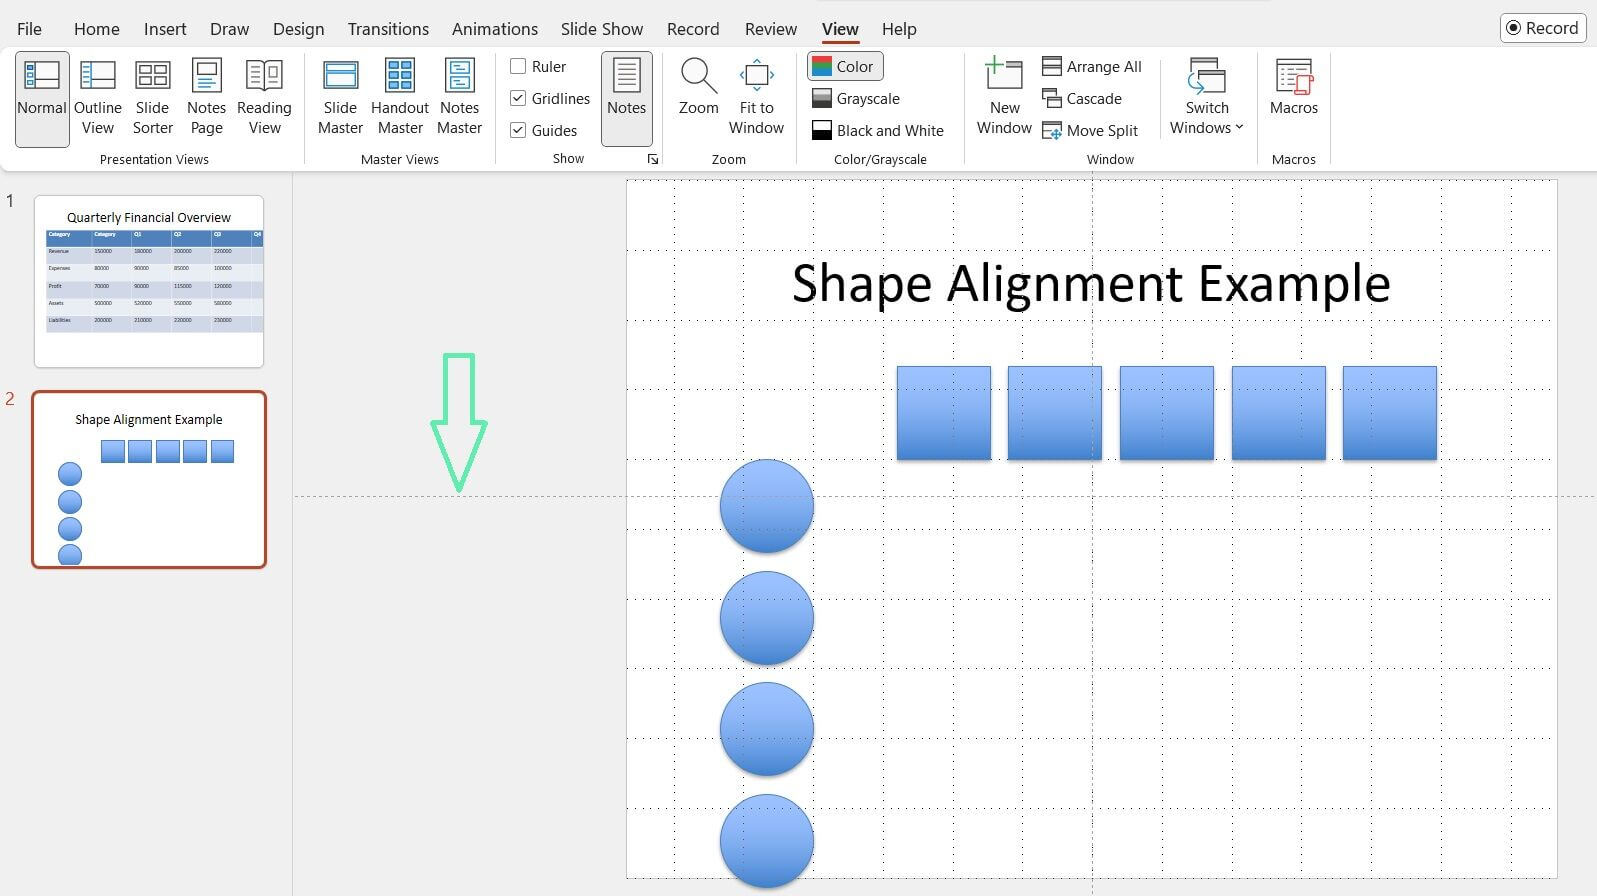
Once the grid and guides are enabled, you can snap shapes to them for precise alignment. Drag a shape close to a gridline or guide until it snaps into place.
Distributing Shapes Evenly
In addition to aligning shapes, PowerPoint allows you to distribute them evenly across a slide. This is particularly useful when you have a series of shapes (data points on a graph) that you want to space out consistently.
To distribute shapes evenly:
Step 1: Select the shapes you want to distribute.
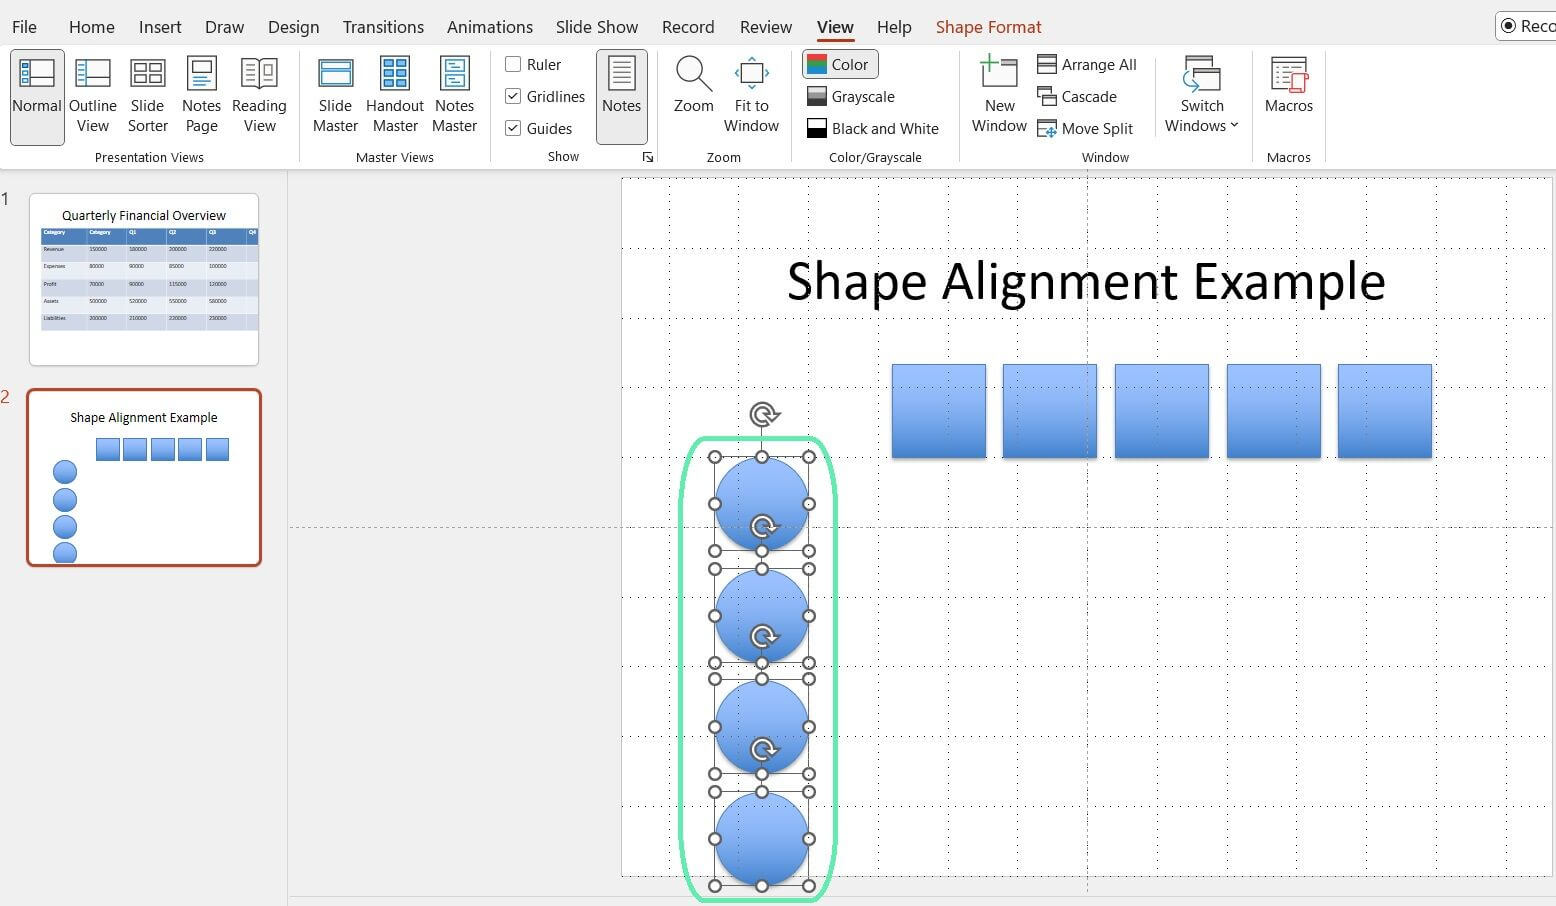
Step 2: Go to the ‘Shape Format’ tab and click the ‘Align’ button.
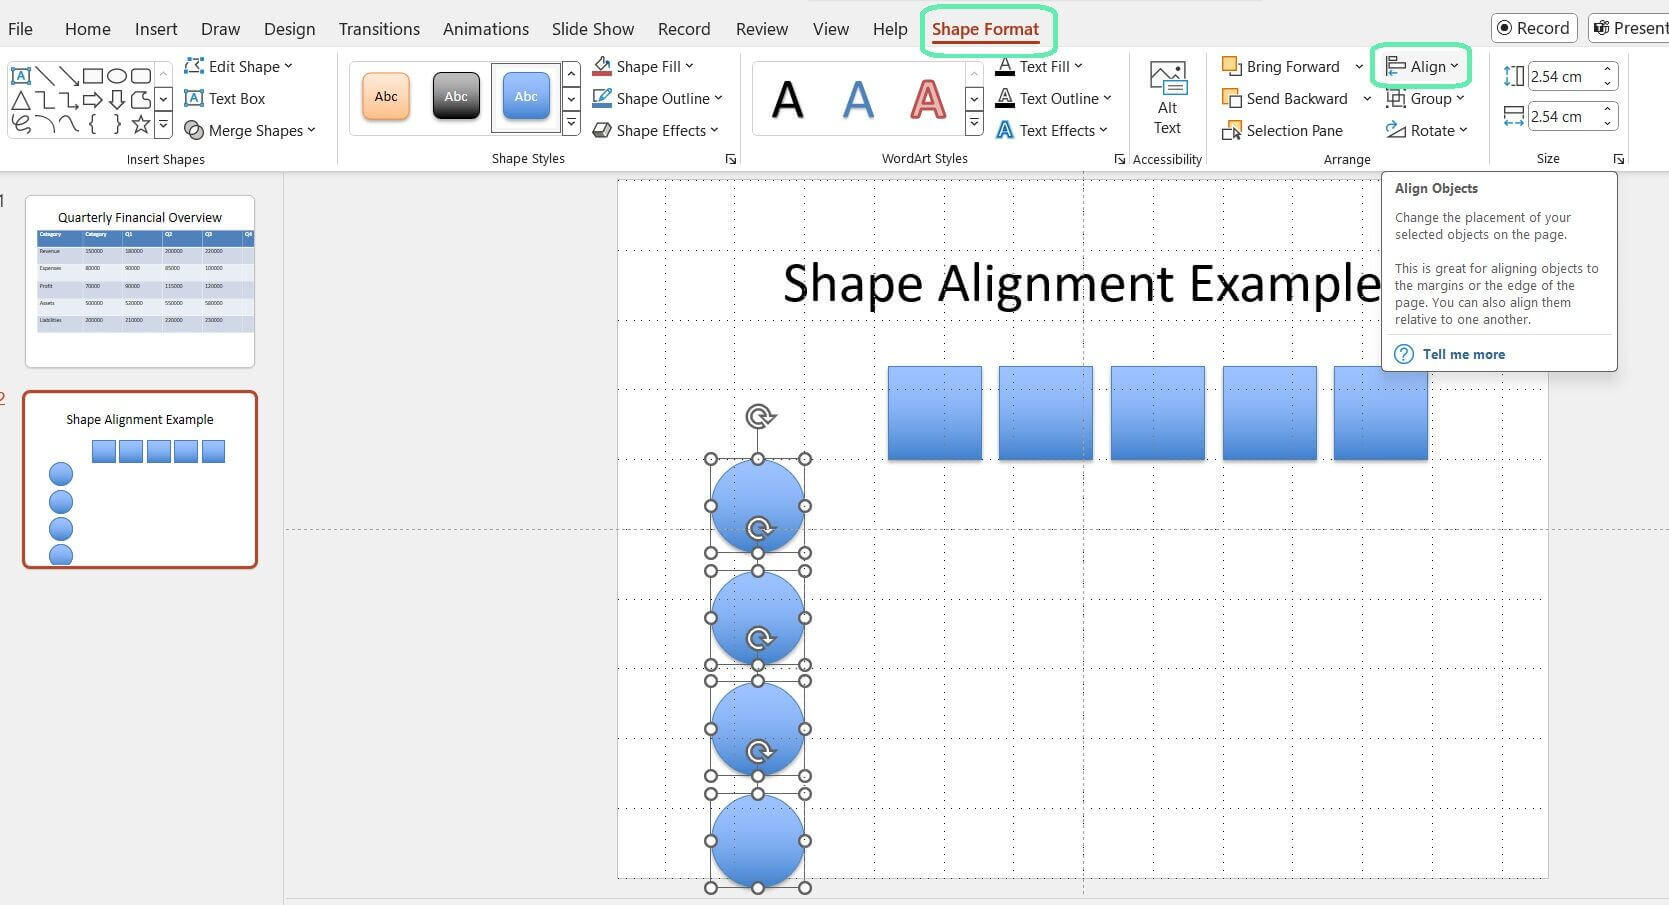
Step 3: Choose ‘Distribute Horizontally’ or ‘Distribute Vertically’, depending on the desired direction.
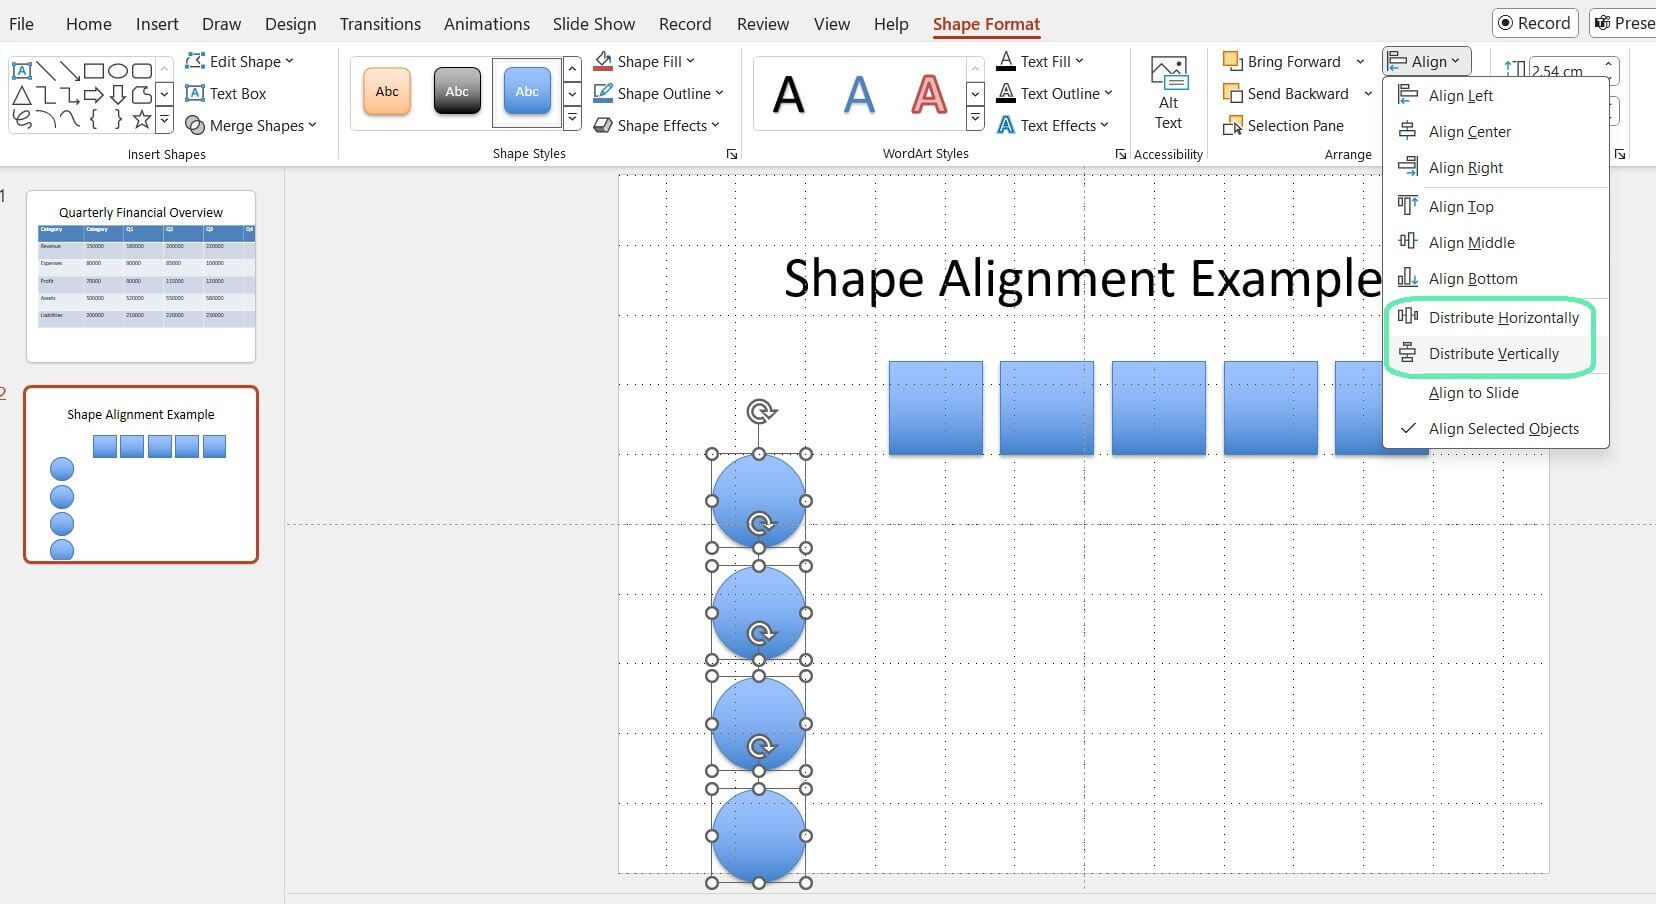
PowerPoint will automatically adjust the spacing between the selected shapes to be evenly distributed. This can save you much time and effort than manually positioning each shape.
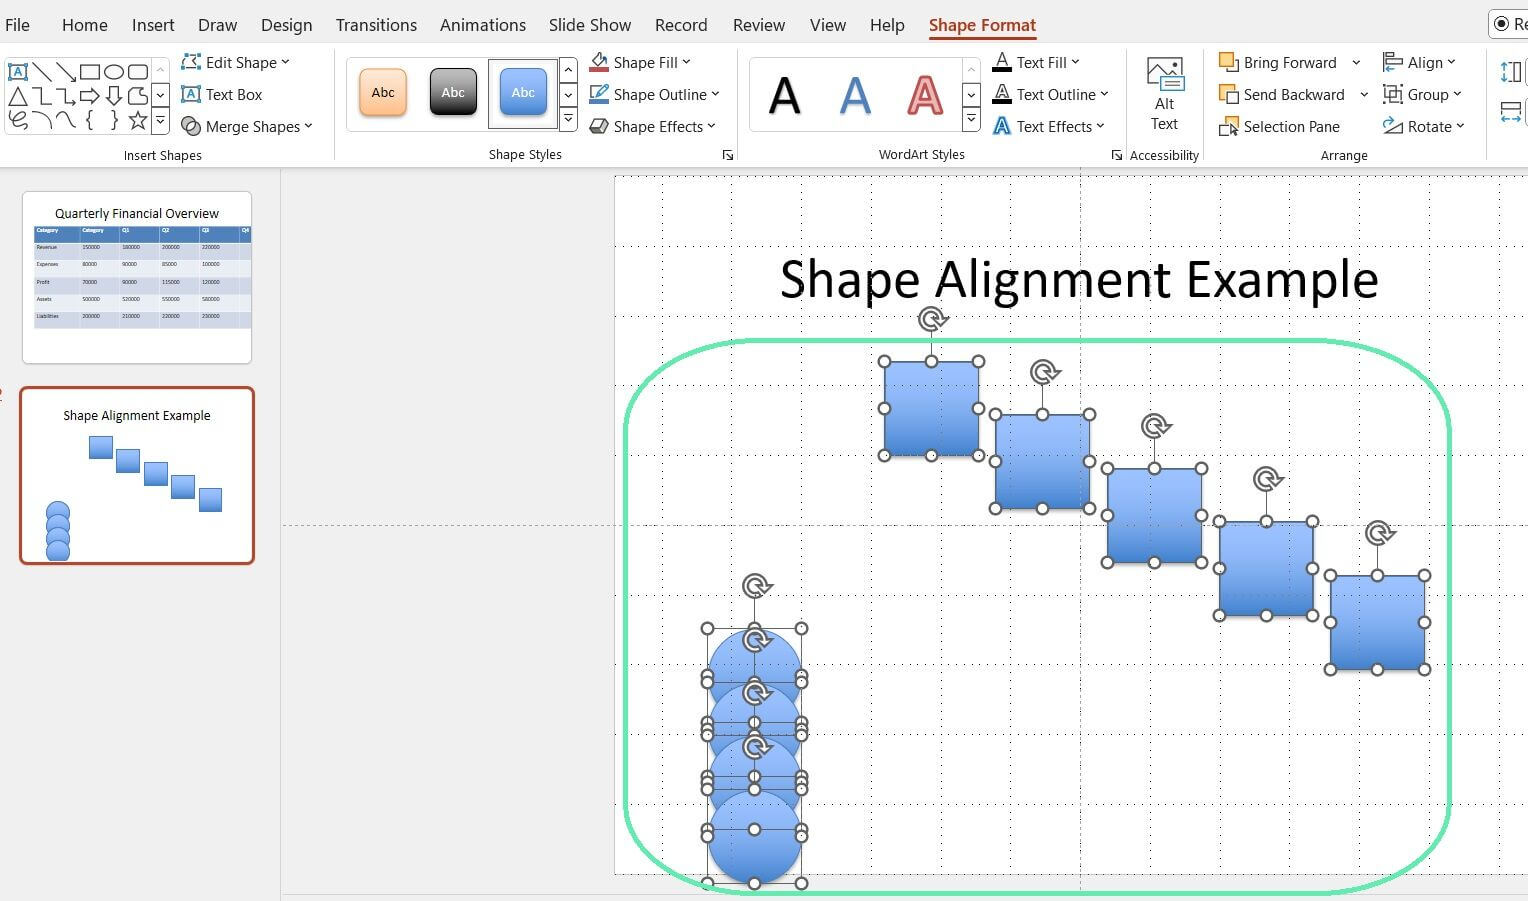
Advanced Alignment Techniques
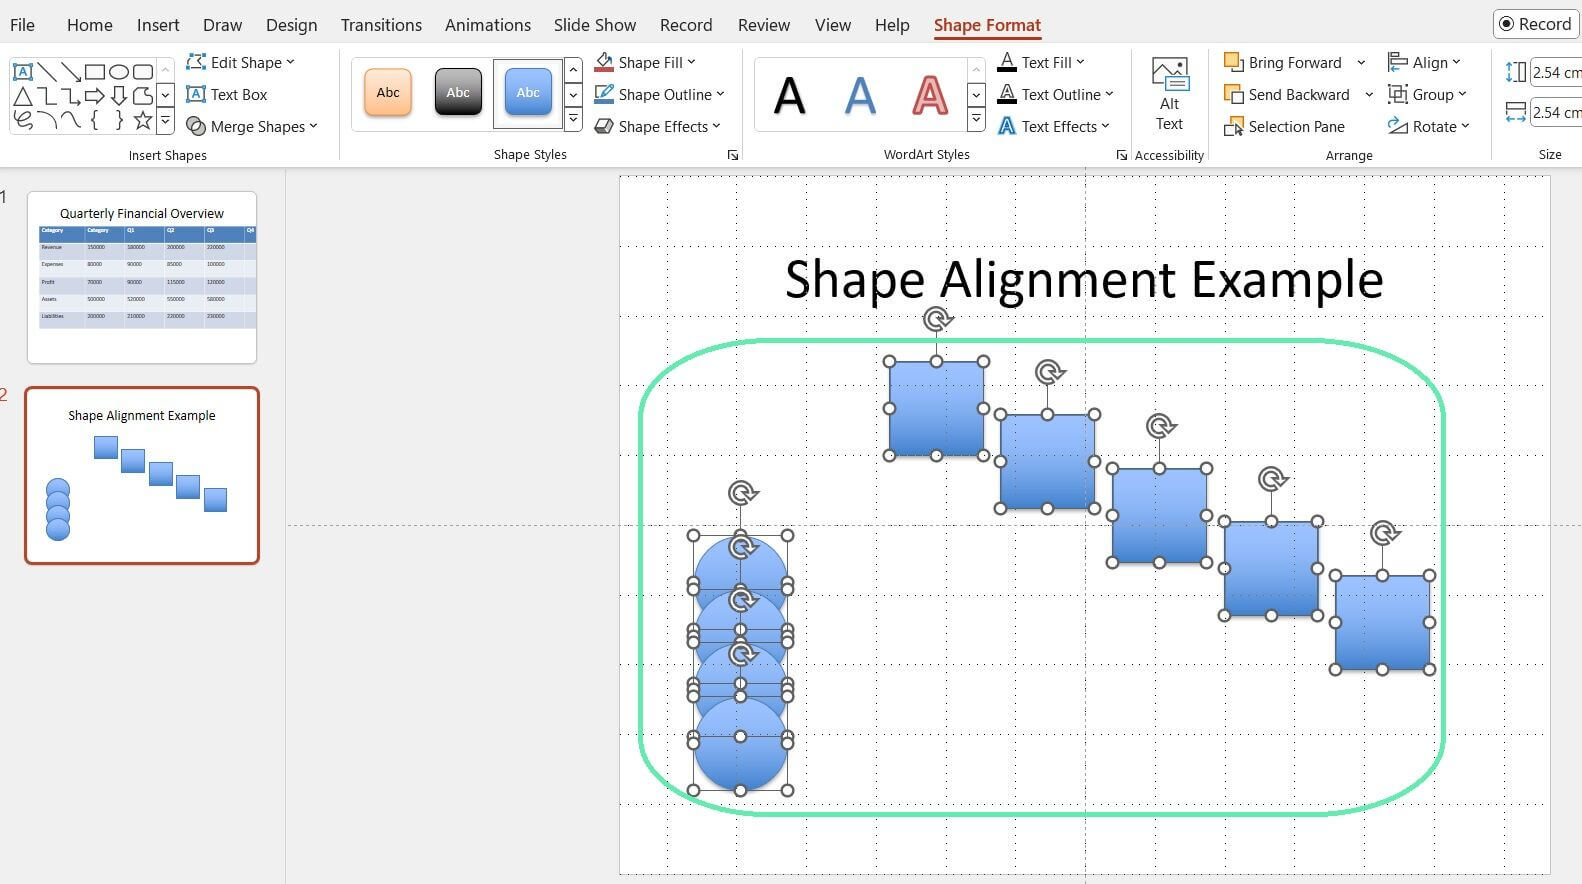
When multiple shapes need to be aligned together, grouping them can be a powerful technique. Grouping enables you to treat multiple shapes as a single object, making it easier to align and position them consistently.
To group shapes:
Step 1: Select the shapes you want to group.
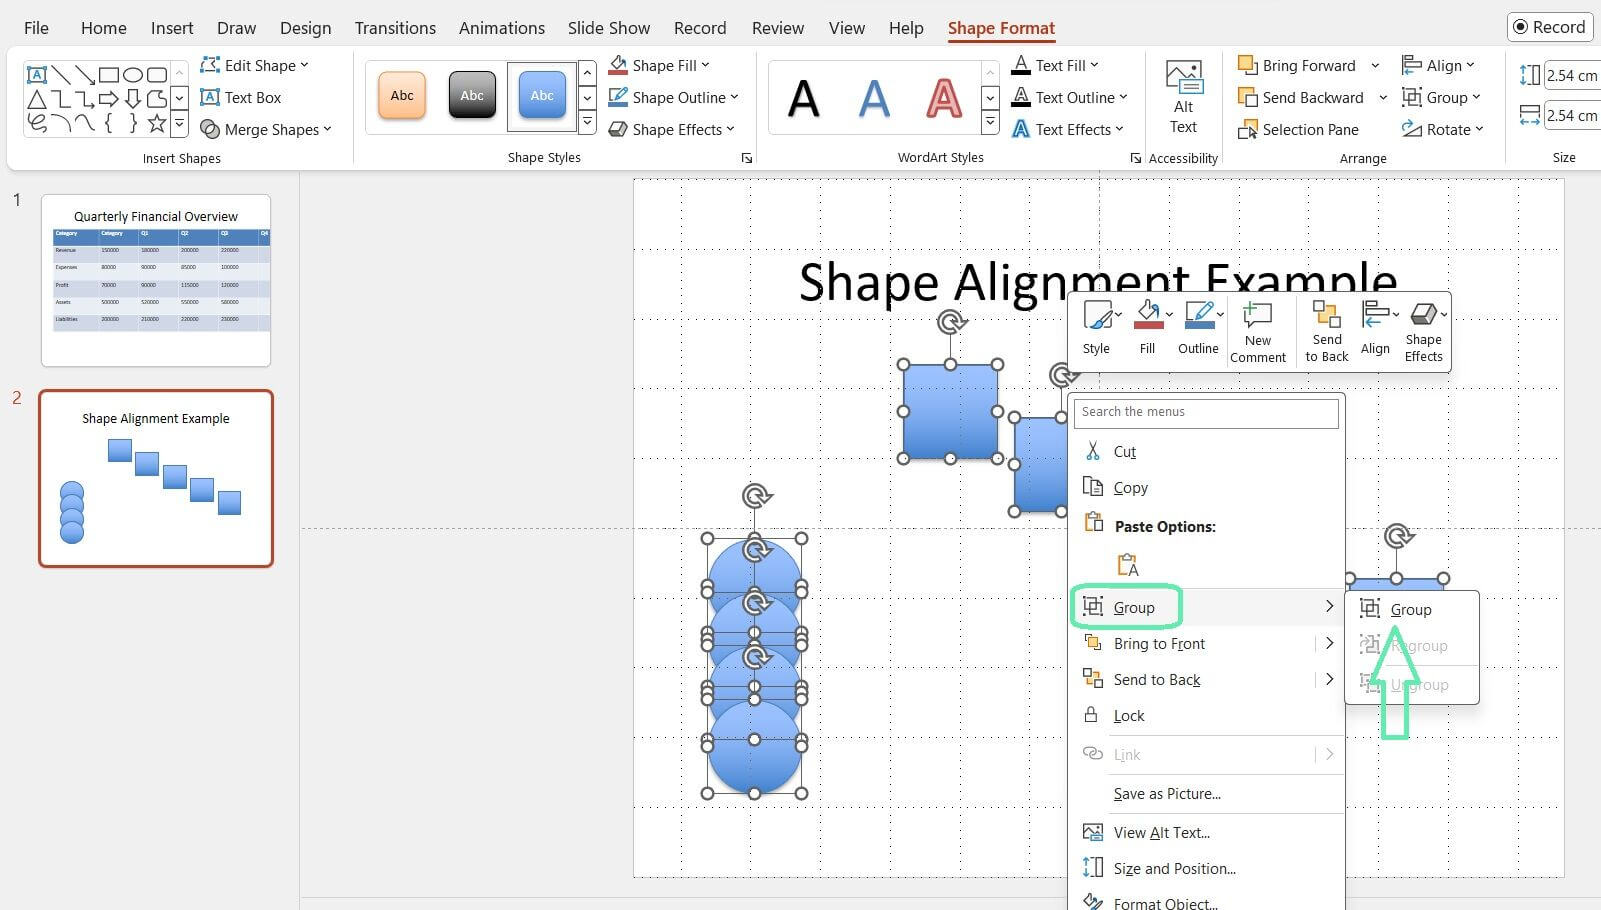
Step 2: Right-click and choose ‘Group’, or use the keyboard shortcut ‘Ctrl+G’.
Once shapes are grouped, you can align them as a single unit using the techniques we’ve already covered. This is especially useful for elements like legends or data labels that must be positioned relative to a chart or graph.
Using Smart Guides for Dynamic Alignment
Smart Guides in PowerPoint help with dynamic alignment as you move shapes around the slide, indicating when edges or centers are aligned.
To enable Smart Guides:
Step 1: Go to the ‘View’ tab in the PowerPoint ribbon.
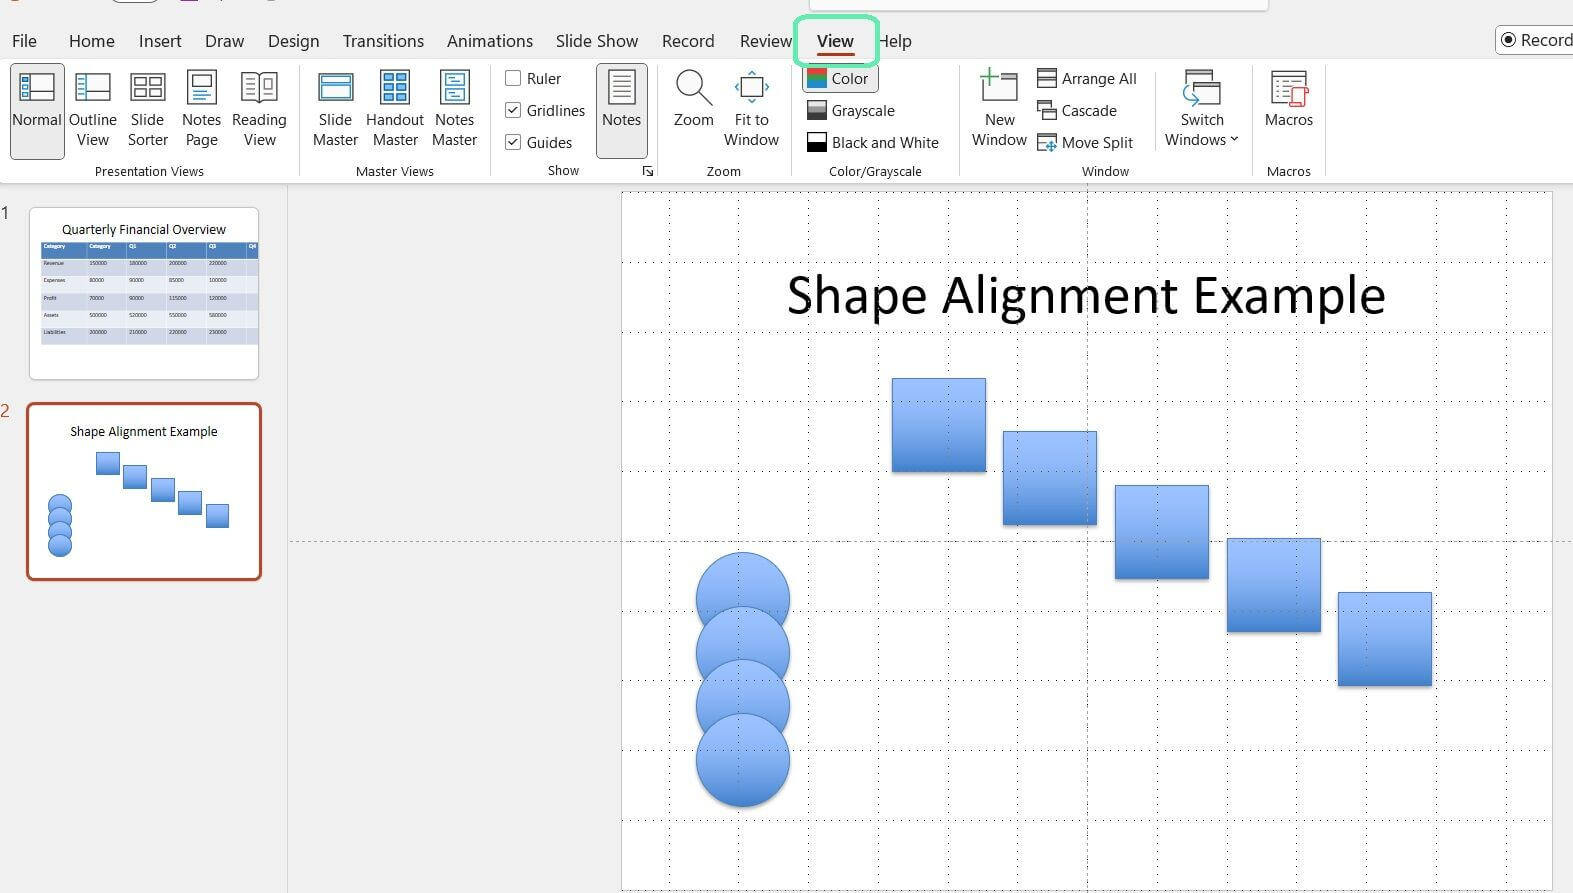
Step 2: In the ‘Show’ group, check the box next to ‘Smart Guides’.
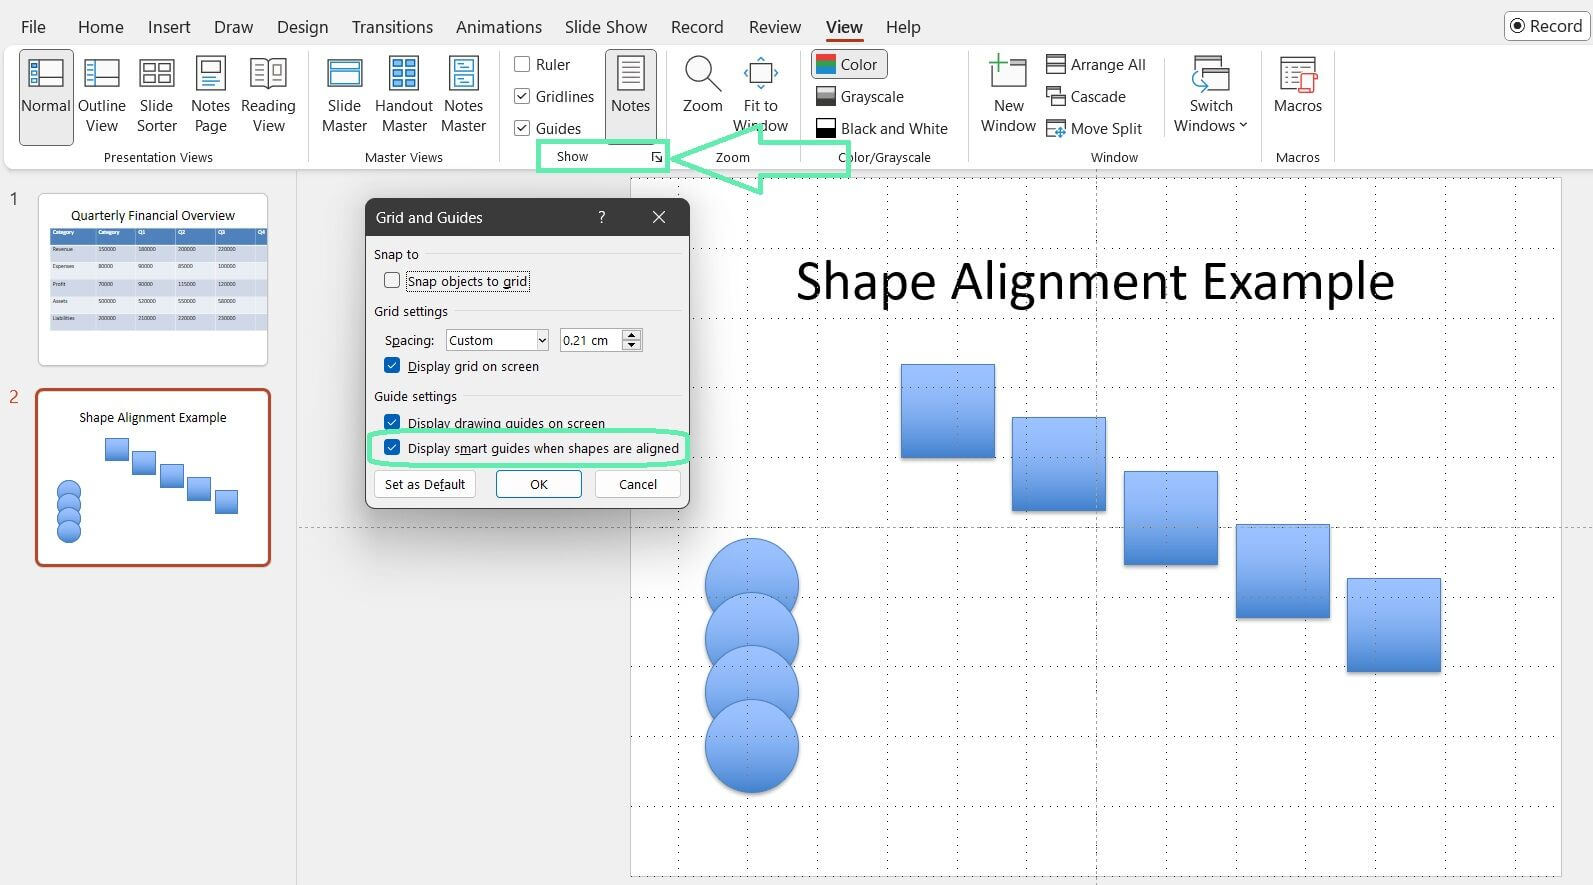
Smart Guides provide real-time alignment lines for easy shape positioning, saving time on complex slides and layout adjustments.
Aligning Shapes to a Slide or Text Box
You can align shapes relative to the entire slide or a specific text box rather than each other. PowerPoint makes this easy with a few simple steps:
Step 1: Select the shape you want to align.
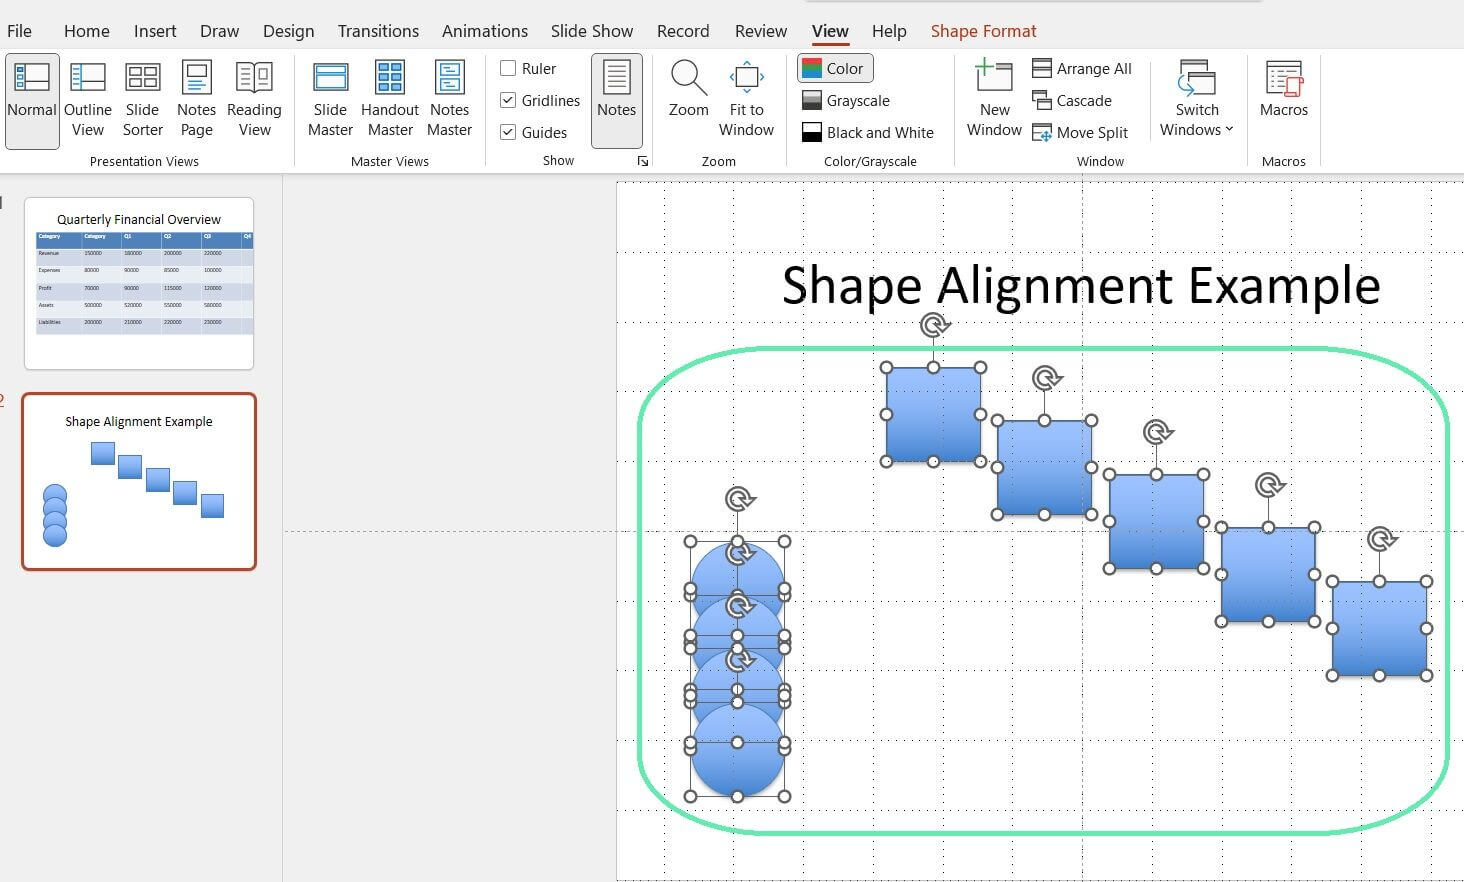
Step 2: Go to the ‘Shape Format’ tab and click the ‘Align’ button.
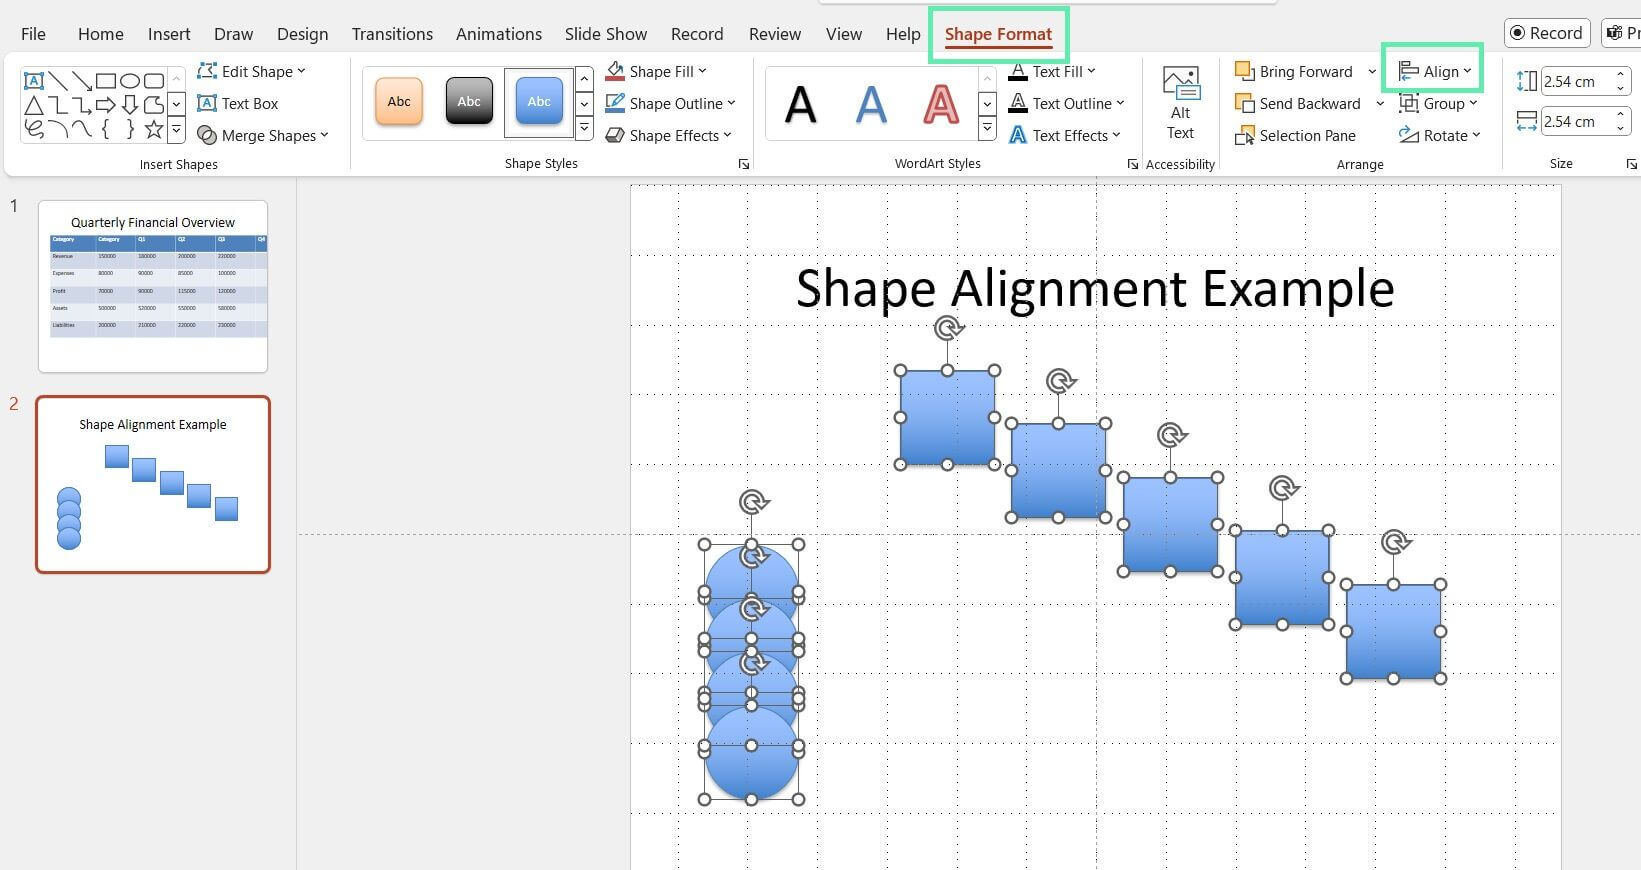
Step 3: Choose ‘Align to Slide’.
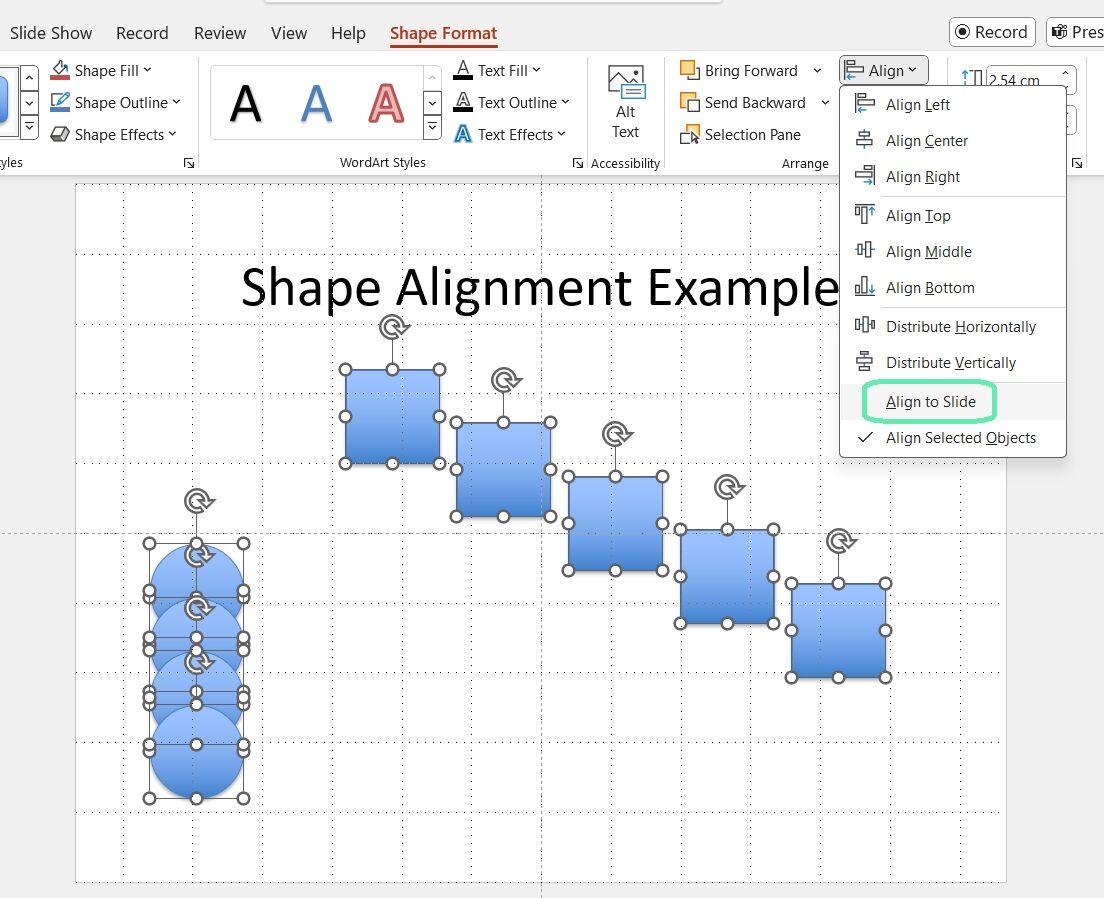
Align shapes to the slide or margin for consistent positioning, which helps create clean, symmetrical layouts.
Common Mistakes and How to Avoid Them
Even with all the alignment tools and techniques at your disposal, it’s still possible to encounter some common misalignment issues. Here are a few to watch out for:
- Uneven spacing between shapes can happen when shapes are aligned but not distributed evenly. To fix this, use the ‘Distribute’ options in the ‘Align’ dropdown menu.
- When positioned too closely, shapes can overlap and create visual clutter. To avoid this, use the grid and guides to maintain consistent spacing or manually adjust the positioning of the shapes.
- To maintain consistency, consider creating a template with predefined alignment guides or using the ‘Align to Slide’ option to ensure that shapes are positioned consistently on each slide.
Misaligned shapes can make your slides look sloppy and unprofessional, undermining your credibility, especially when presenting financial data to detail-oriented audiences. Aligning your shapes conveys professionalism and attention to detail, building trust and confidence in your insights.
Quick Tips and Tricks for Mastering Shape Alignment
Here are a few quick tips and tricks to keep in mind as you work on aligning shapes in PowerPoint:
- Use keyboard shortcuts to speed up the alignment process. For example, select multiple shapes and press Ctrl+Shift+Left/Right/Up/Down to align them quickly.
- When aligning multiple shapes, start by aligning the farthest apart ones, then work inward to avoid unnecessary adjustments later.
- Zoom in on the slide for a more precise view using the zoom slider in the bottom right corner of the PowerPoint window.
Using Shape Tools by Macabacus
If you wish to take your presentation-making skills to the next level, Macabacus offers a number of tools that allow users to reposition and resize shapes beyond PowerPoint’s native functionality. You can find the tools in the ‘Shapes’ group on the Macabacus tab. With the said tools, you’ll have additional functionality or more intuitive behavior than just using PowerPoint.
Compared to PowerPoint, Macabacus always aligns selected shapes to the first shape chosen, producing consistent results. Use the alignment buttons to align shapes’ top, bottom, right, or left edges, or horizontal or vertical midpoints.
If you select a single shape only, Macabacus will align the selected shape relative to the slide upon the first click of an alignment button. If you click the alignment button again, you’ll see your chosen shape aligned with the body placeholder on your slide master, which implicitly defines your slides’ margins.
Auto Align Button
The Macabacus ‘Auto Align’ button (found under the ‘More Shape Tools’ tab) enables users to fix minor misalignments among three or more chosen shapes, or if no shape is selected, all shapes on the chosen slide. The tool uses placeholders to check for misalignment but does not reposition the placeholders. When detecting misalignment, Auto Align uses the same logic as those used by Macabacus’s proofing tools.
Conclusion
We explored the importance of shape alignment in PowerPoint presentations for investment bankers and finance professionals, covering basic alignment types, available tools, and advanced techniques for improving slides.
Some of the key takeaways include:
- Proper alignment is crucial for creating a professional, polished look that enhances your credibility as a presenter.
- PowerPoint provides various tools and features for aligning shapes, including the ‘Align’ tool, grid and guides, and Smart Guides.
- Grouping shapes, aligning them to the slide or margin, and distributing them evenly can help create clean, consistent layouts.
- Misalignment issues can undermine your message and make your slides look sloppy, so taking the time to get it right is essential.
Macabacus offers specialized tools for finance and banking teams to boost their productivity in Microsoft Office. Trusted by finance professionals worldwide, it helps save time and maintain professionalism.
By mastering shape alignment and leveraging the right tools, you can create presentations that effectively communicate your ideas and leave a lasting impact on your audience.


