Implementing Security Measures in Excel (with Practical Examples)
After gaining a foundational understanding of Excel workbook security, let’s explore how to implement such measures using practical examples from the provided dataset, focusing on specific use cases for investment bankers.
Method 1: Password Protecting Your Workbook
Setting a password is a simple way to secure your Excel file. Only people with the password can see sensitive Information. Here’s how to password-protect your workbook:
Step 1: Open your Excel file.
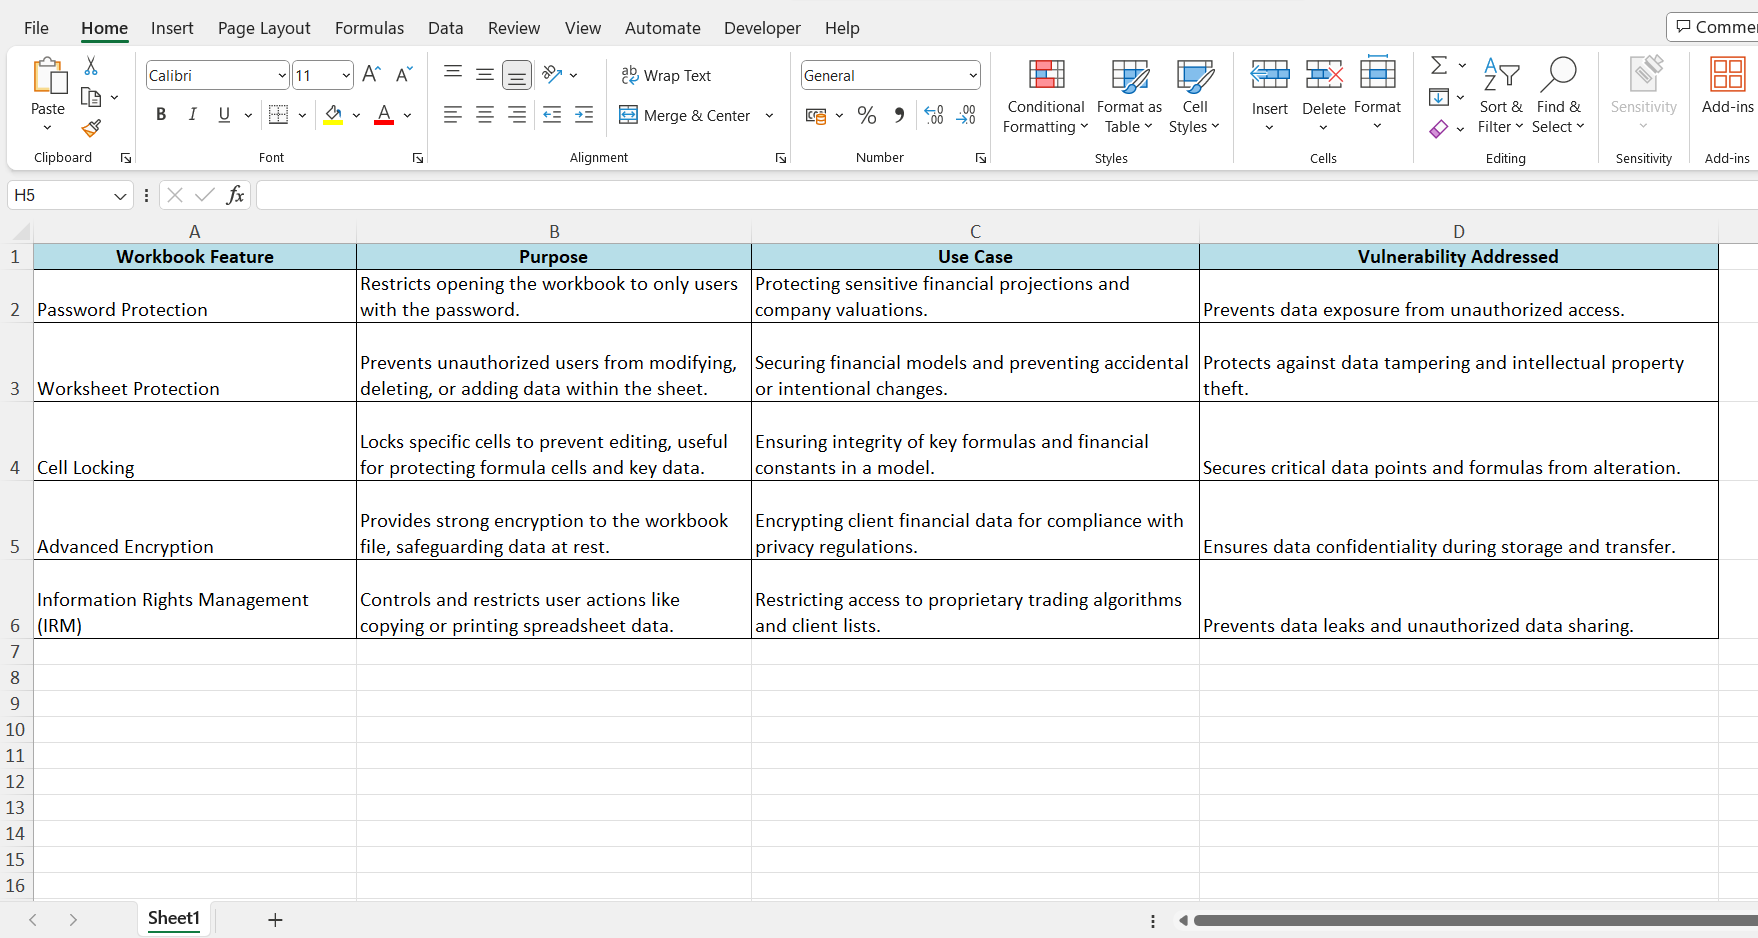
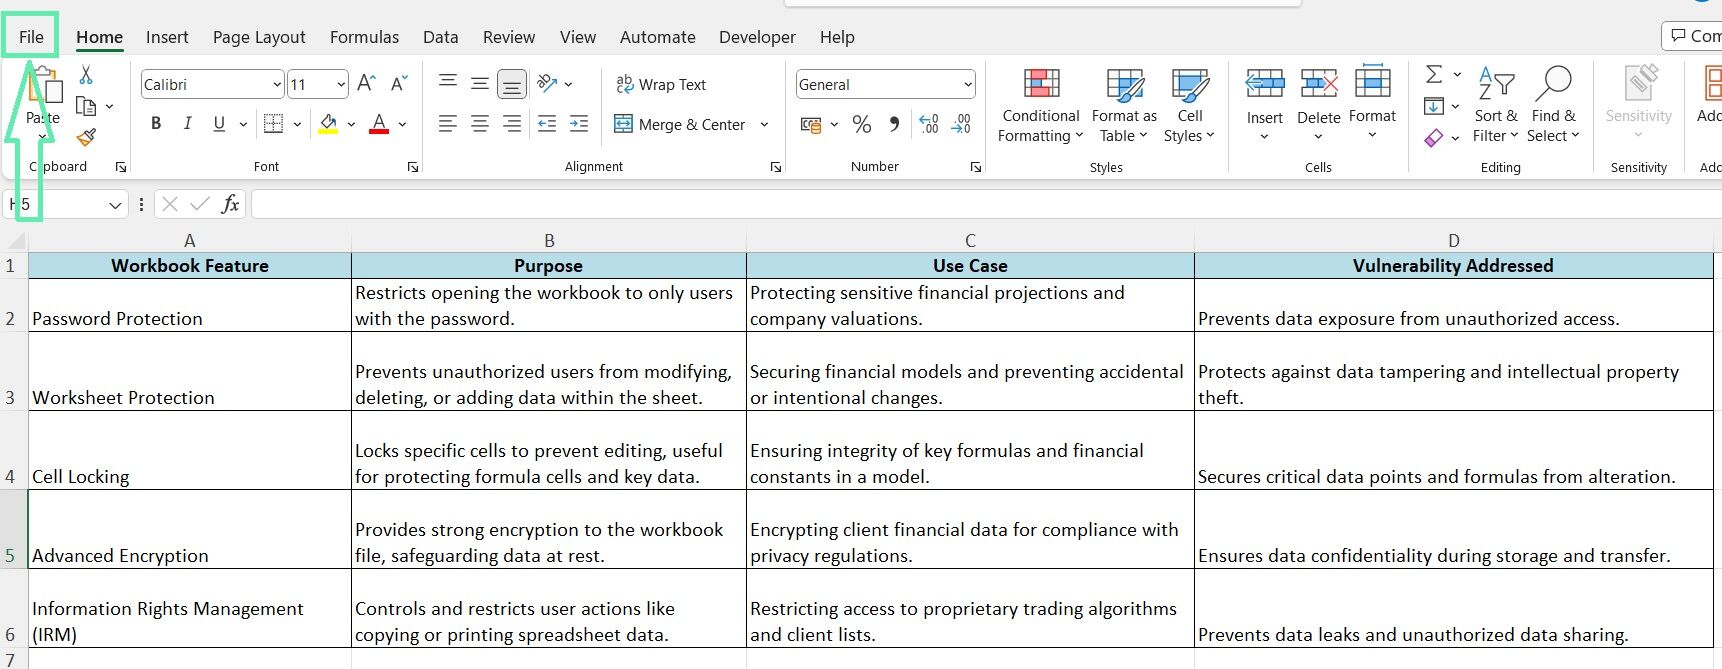
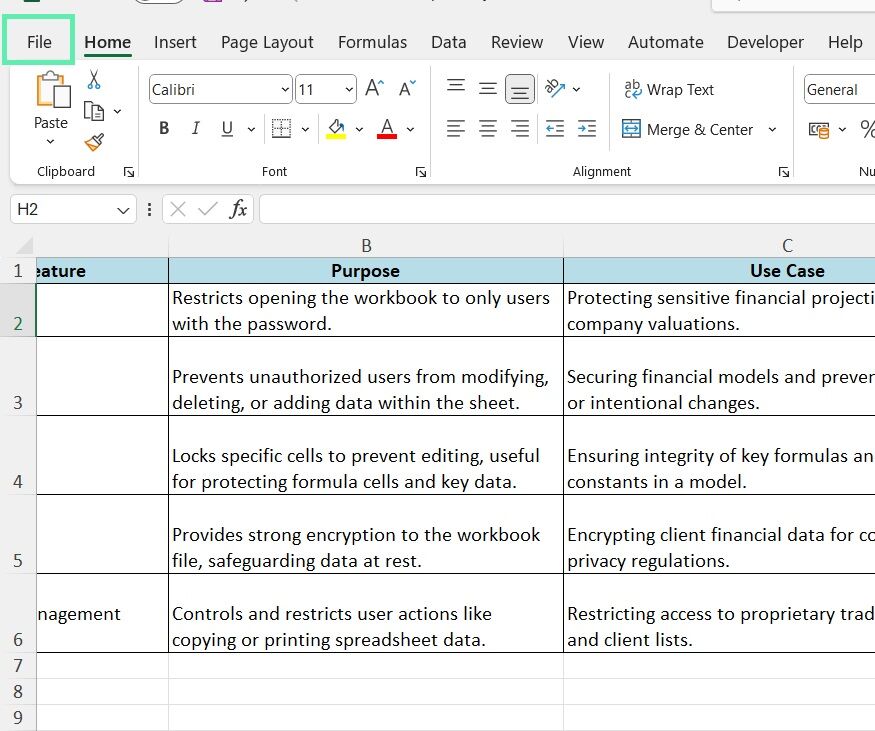
Step 2: Click ‘File’ at the top.
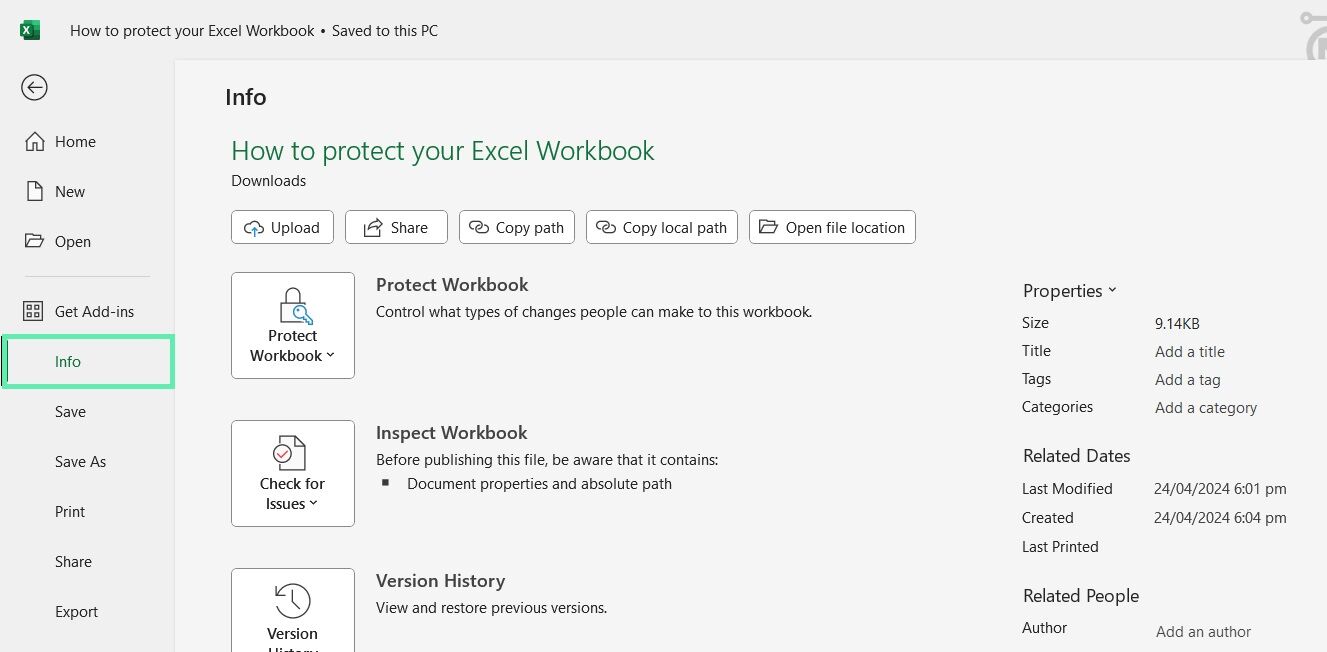
Step 3: Select ‘Info’ on the left side.
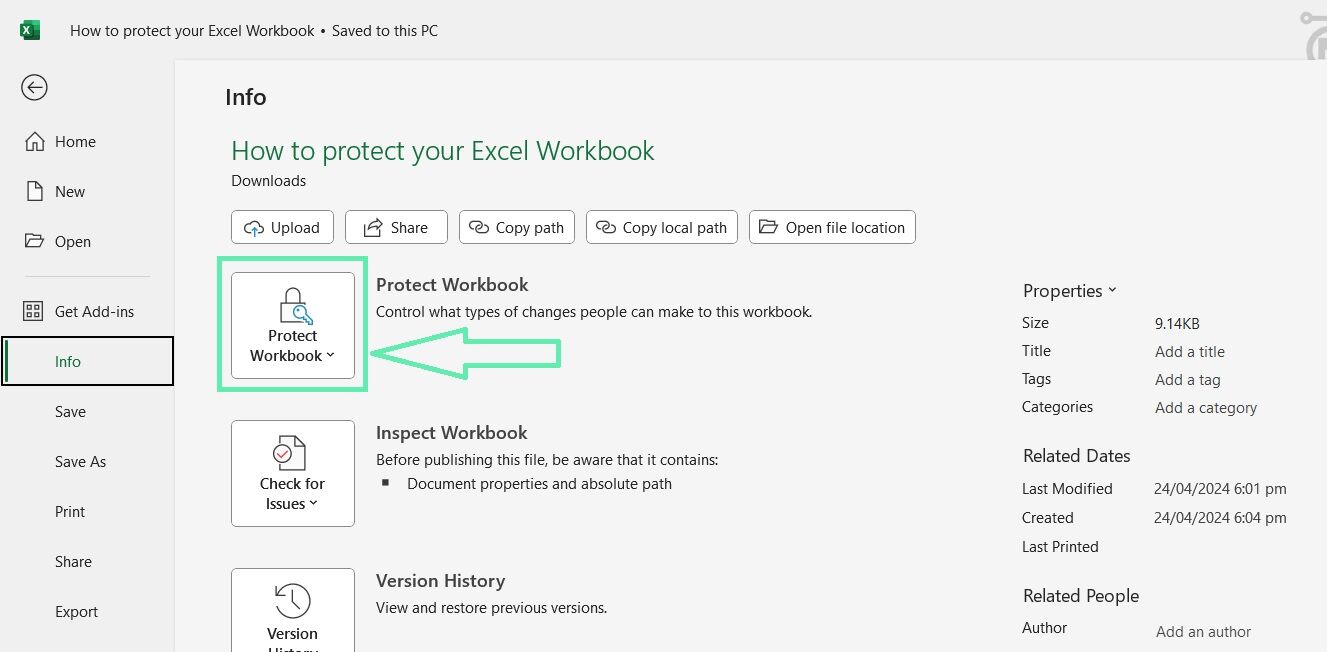
Step 4: Hit ‘Protect Workbook’.
Step 5: Select ‘Encrypt with Password’.
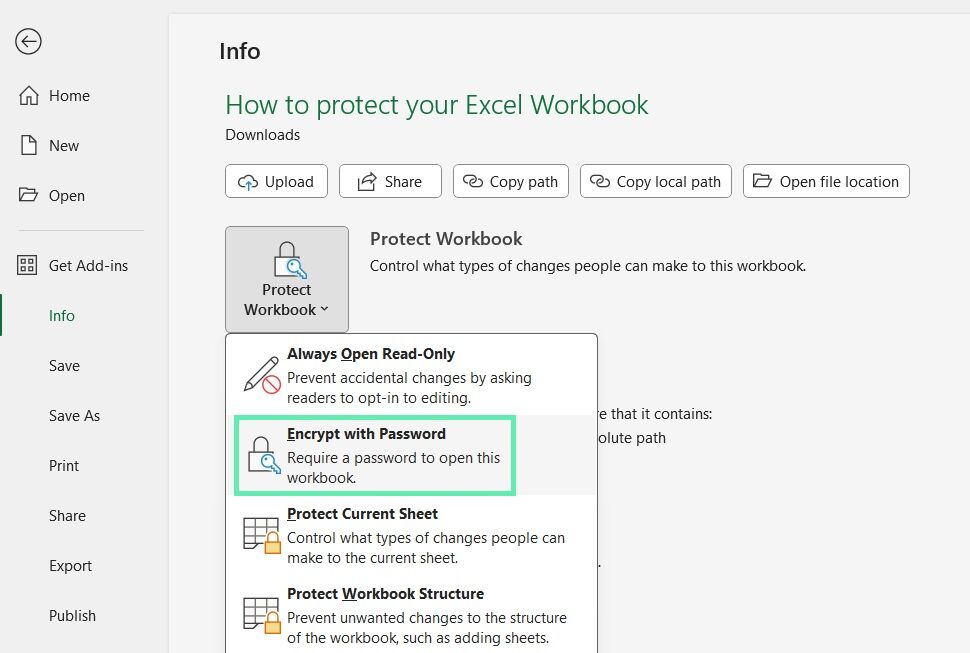
Step 6: Put in a strong password and hit ‘OK’.
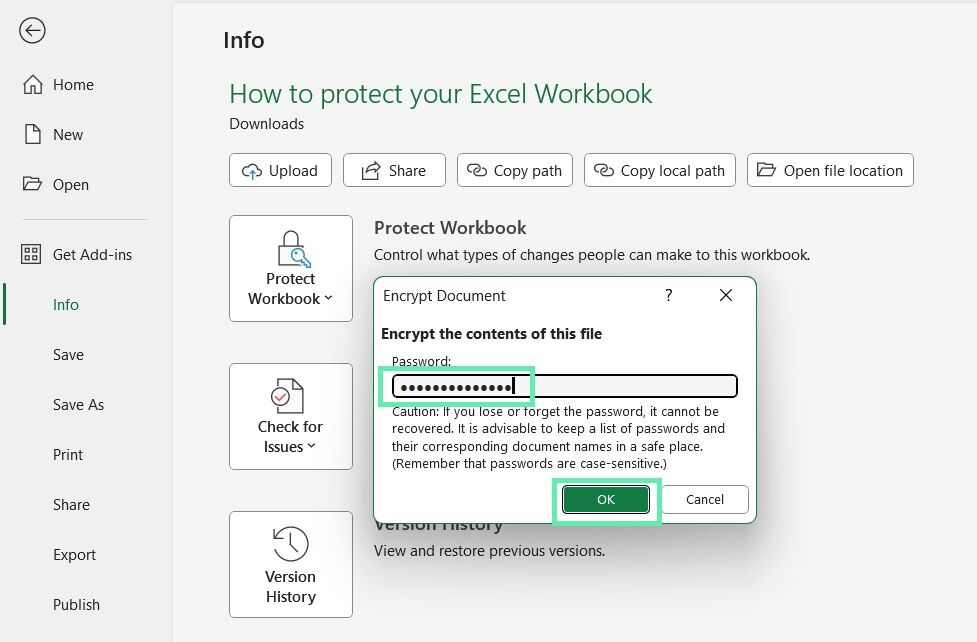
Step 7: Retype your password and click ‘OK’ again.
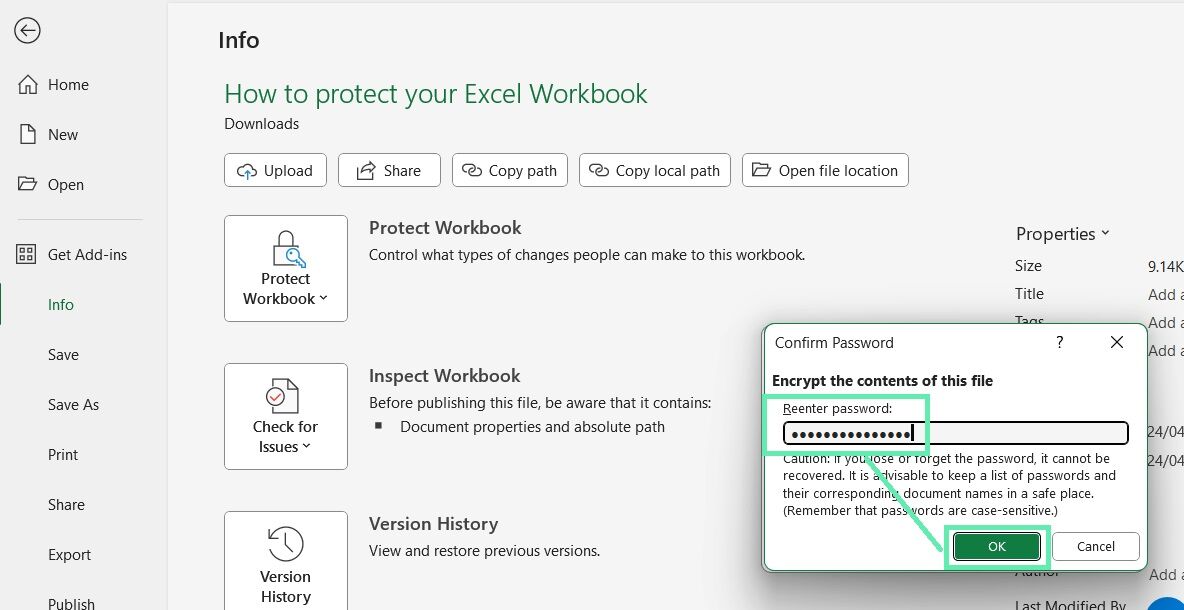
Imagine you’re an investment banker working on a high-profile merger and acquisition deal. Your Excel workbook contains confidential financial projections, company valuations, and due diligence findings. By password-protecting the workbook, you ensure that only authorized team members and clients with the password, a select few, can access the sensitive Information.
Password protection is the first defense against unauthorized access to your Excel workbook. Even if the file falls into the wrong hands, the data remains secure with the correct password.
Method 2: Protecting Specific Worksheets
In addition to password-protecting the entire workbook, you can password-protect specific sheets, too. It’s handy for sheets with different sensitivity levels. Here’s how to protect and customize the sheet settings:
Step 1: Open your workbook and go to the worksheet you want to protect.
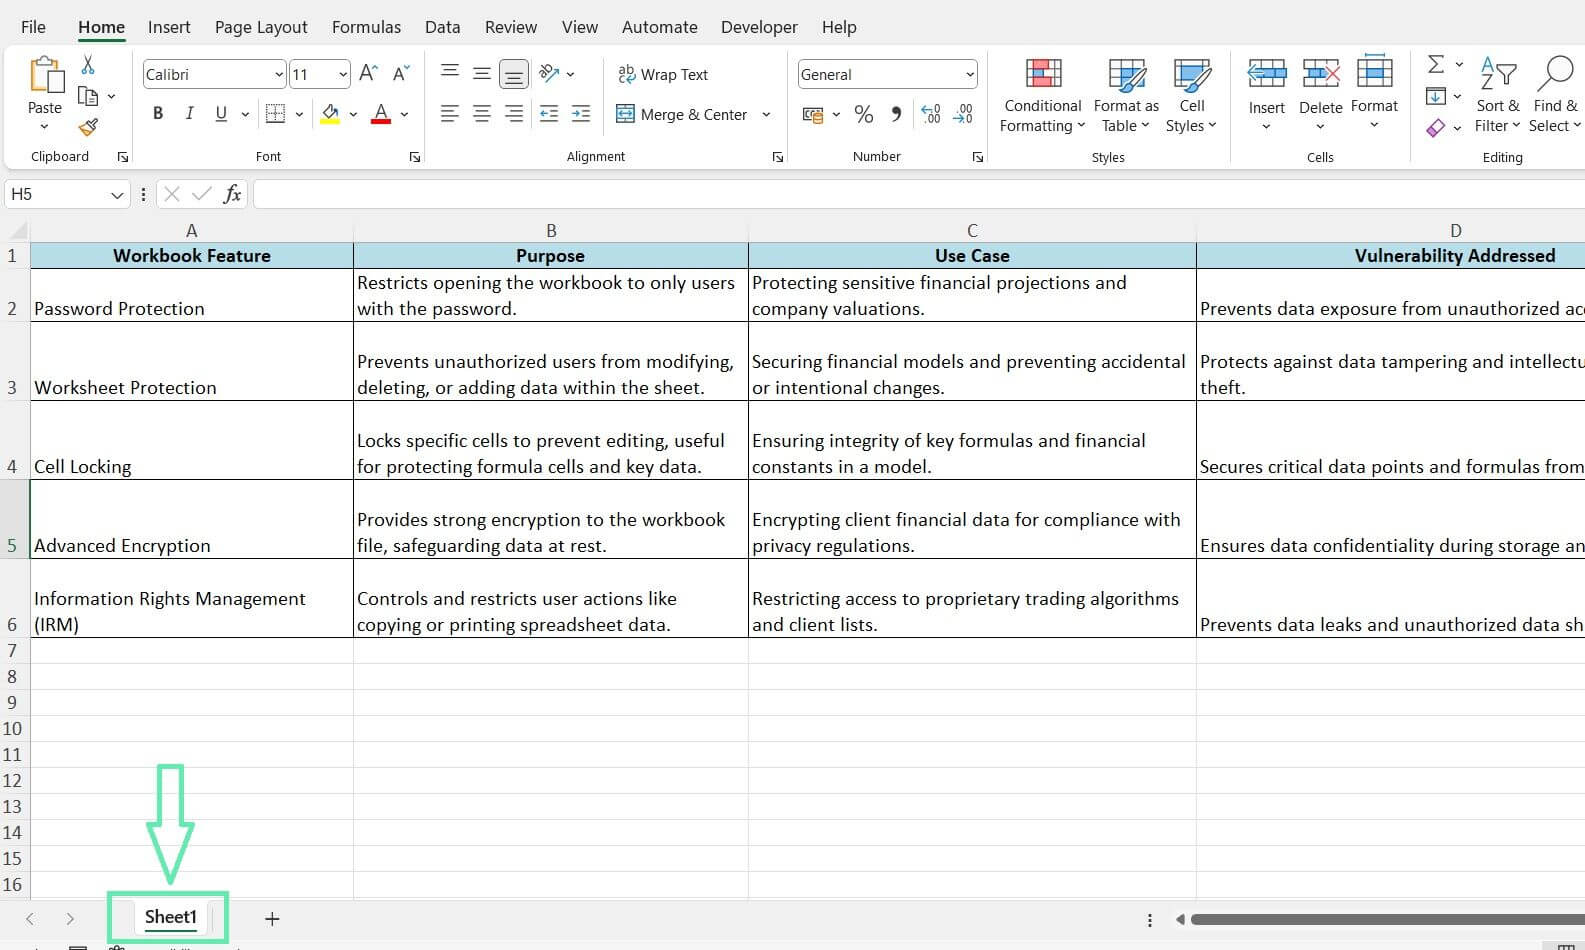
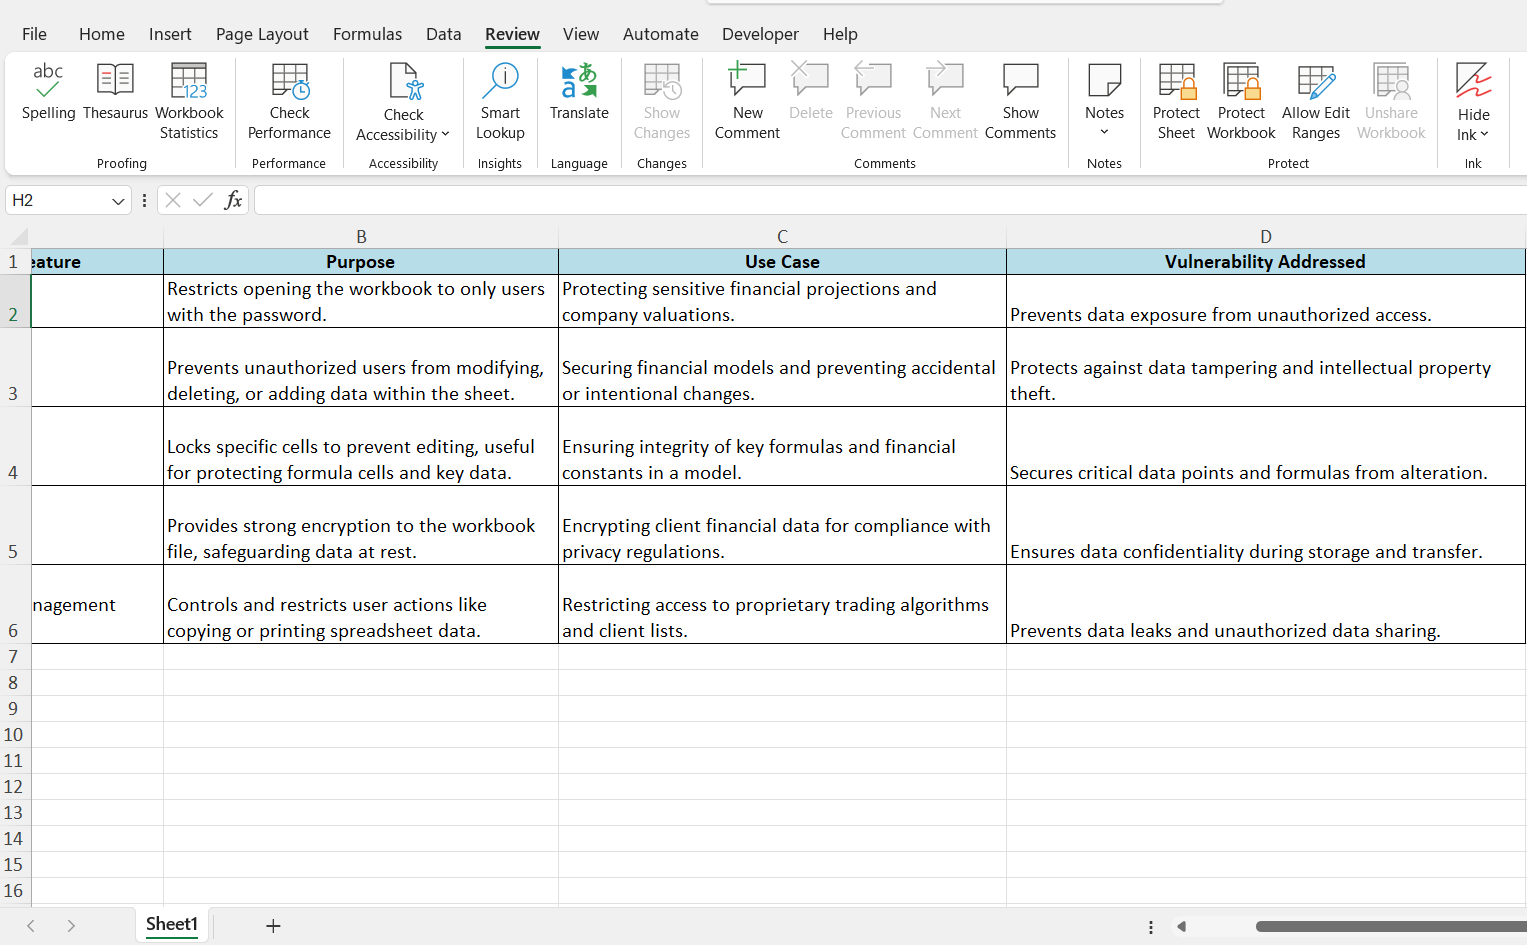
Step 2: Click on the ‘Review’ tab.
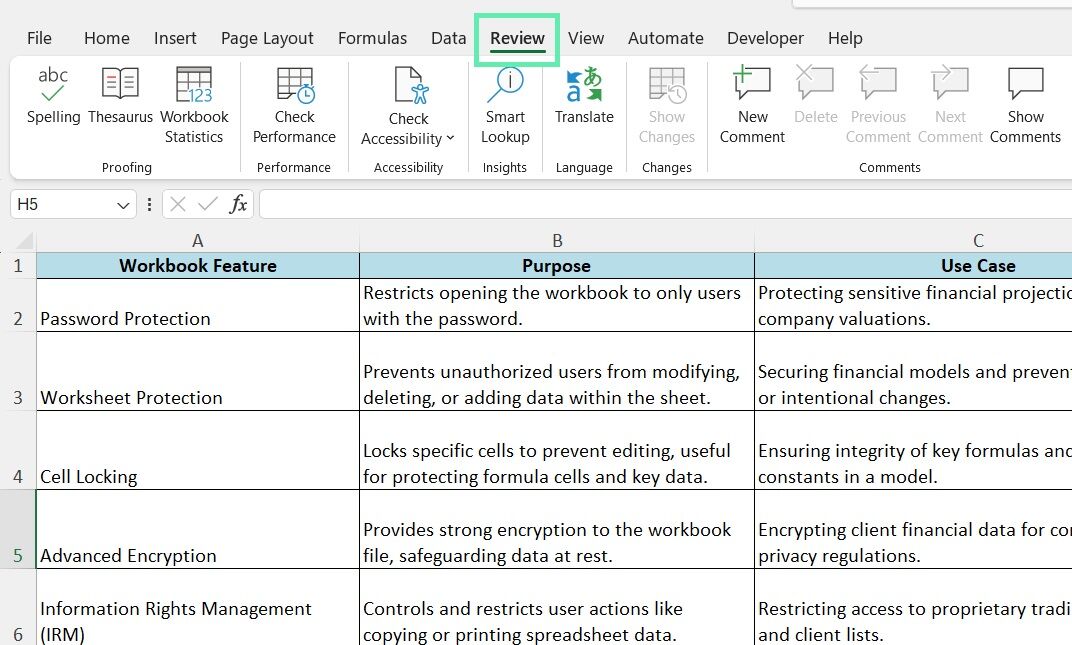
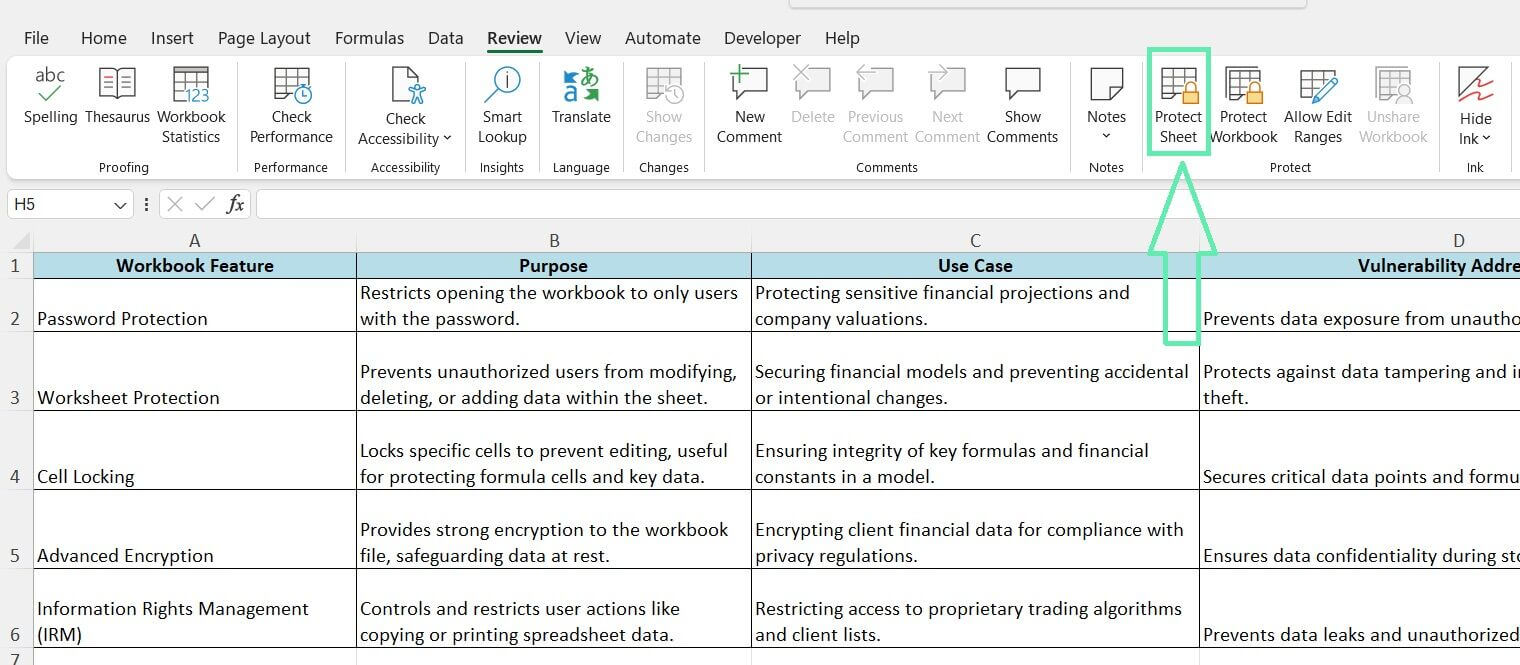
Step 3: In the ‘Protect’ group, click on ‘Protect Sheet’.
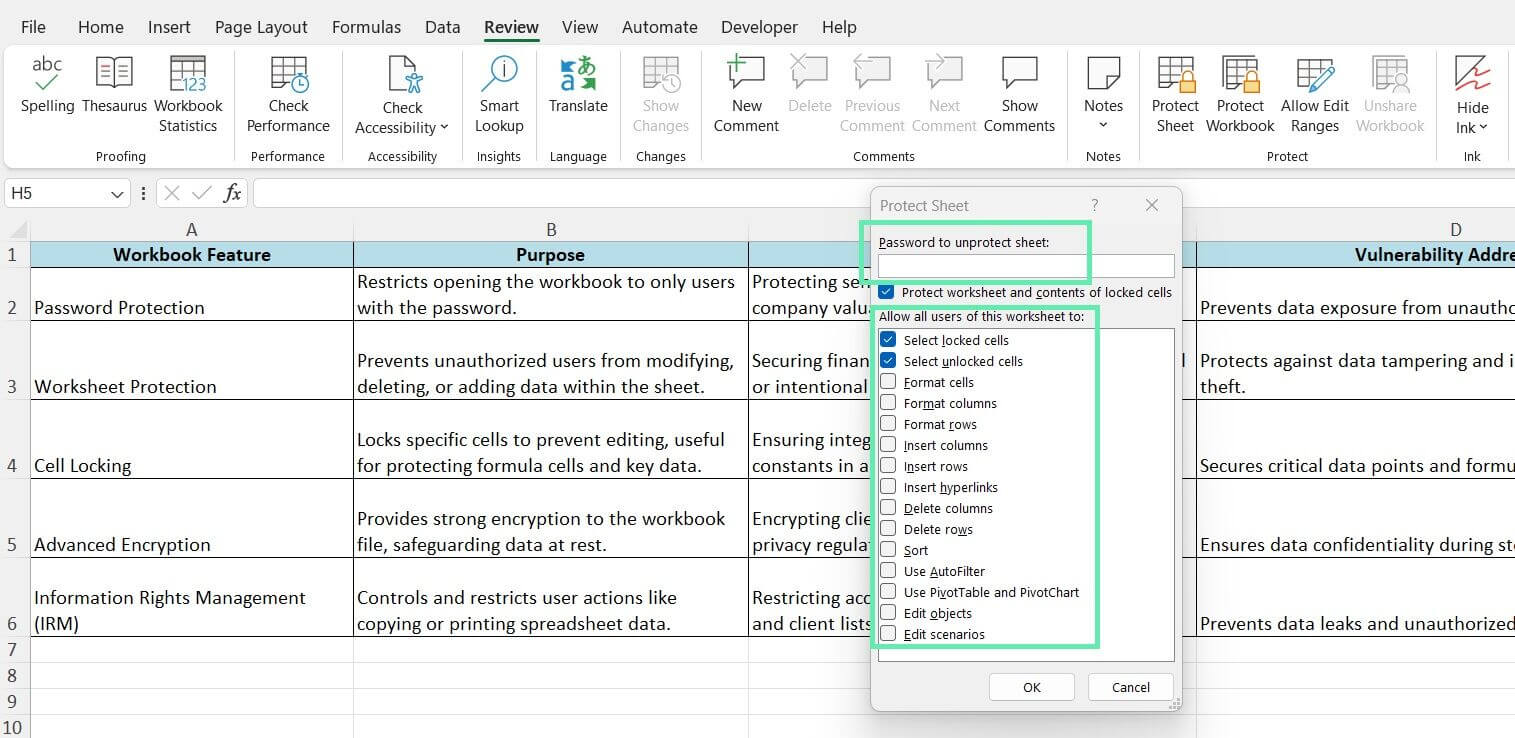
Step 4: Enter a password (optional) and select the desired permissions for users.
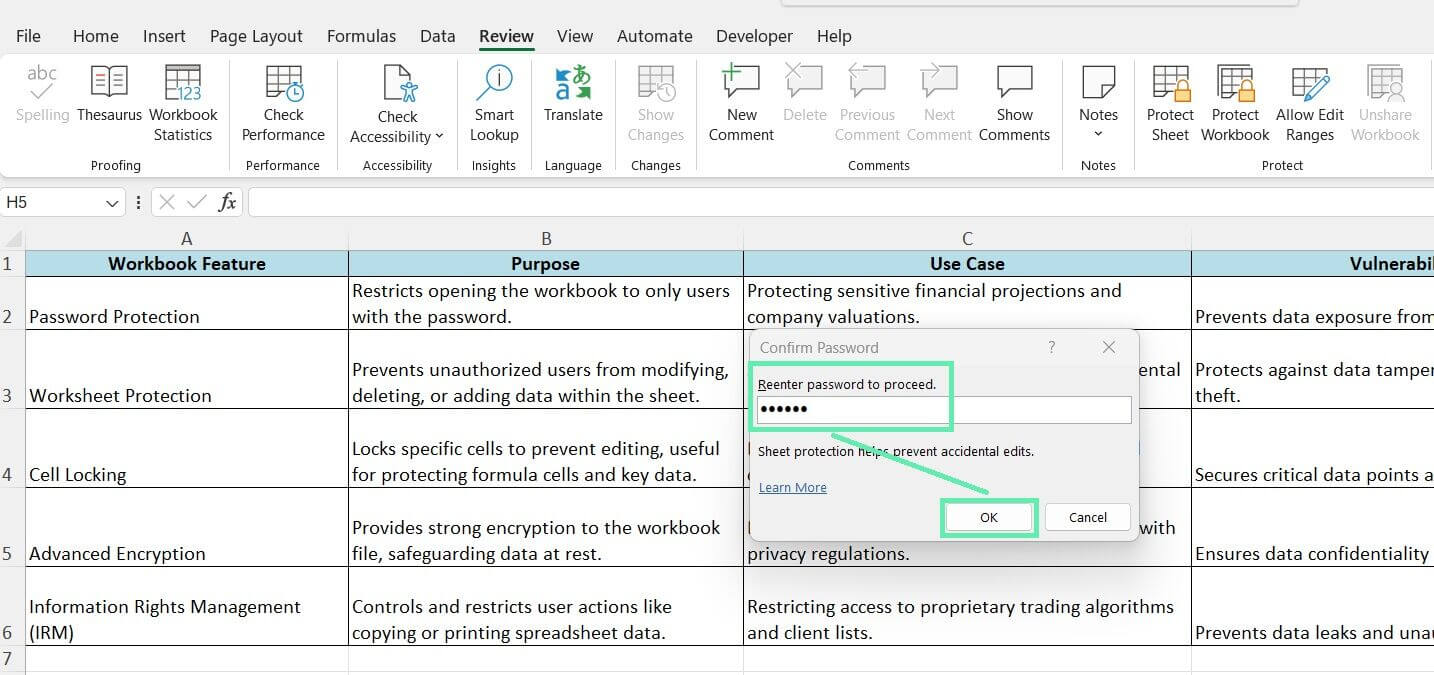
Step 5: Click ‘OK’ and re-enter the password if prompted.
As an investment banker, you often work with complex financial models that involve intricate formulas, assumptions, and calculations. By protecting the worksheets containing the models, you can prevent colleagues or clients from accidentally or intentionally modifying the underlying logic and formulas. It ensures the integrity and reliability of your financial analysis.
Worksheet protection safeguards your proprietary financial models and intellectual property from unauthorized changes or theft. It allows you to maintain control over the structure and calculations of your models, even when collaborating with multiple stakeholders.
Method 3: Locking Cells to Prevent Editing
Sometimes, you allow users to input data into specific cells while protecting others with critical formulas or constants. Excel’s cell locking feature enables you to selectively lock cells within a worksheet, preventing users from modifying their contents. Here’s how to lock cells:
Step 1: Open your Excel workbook and go to the desired worksheet.
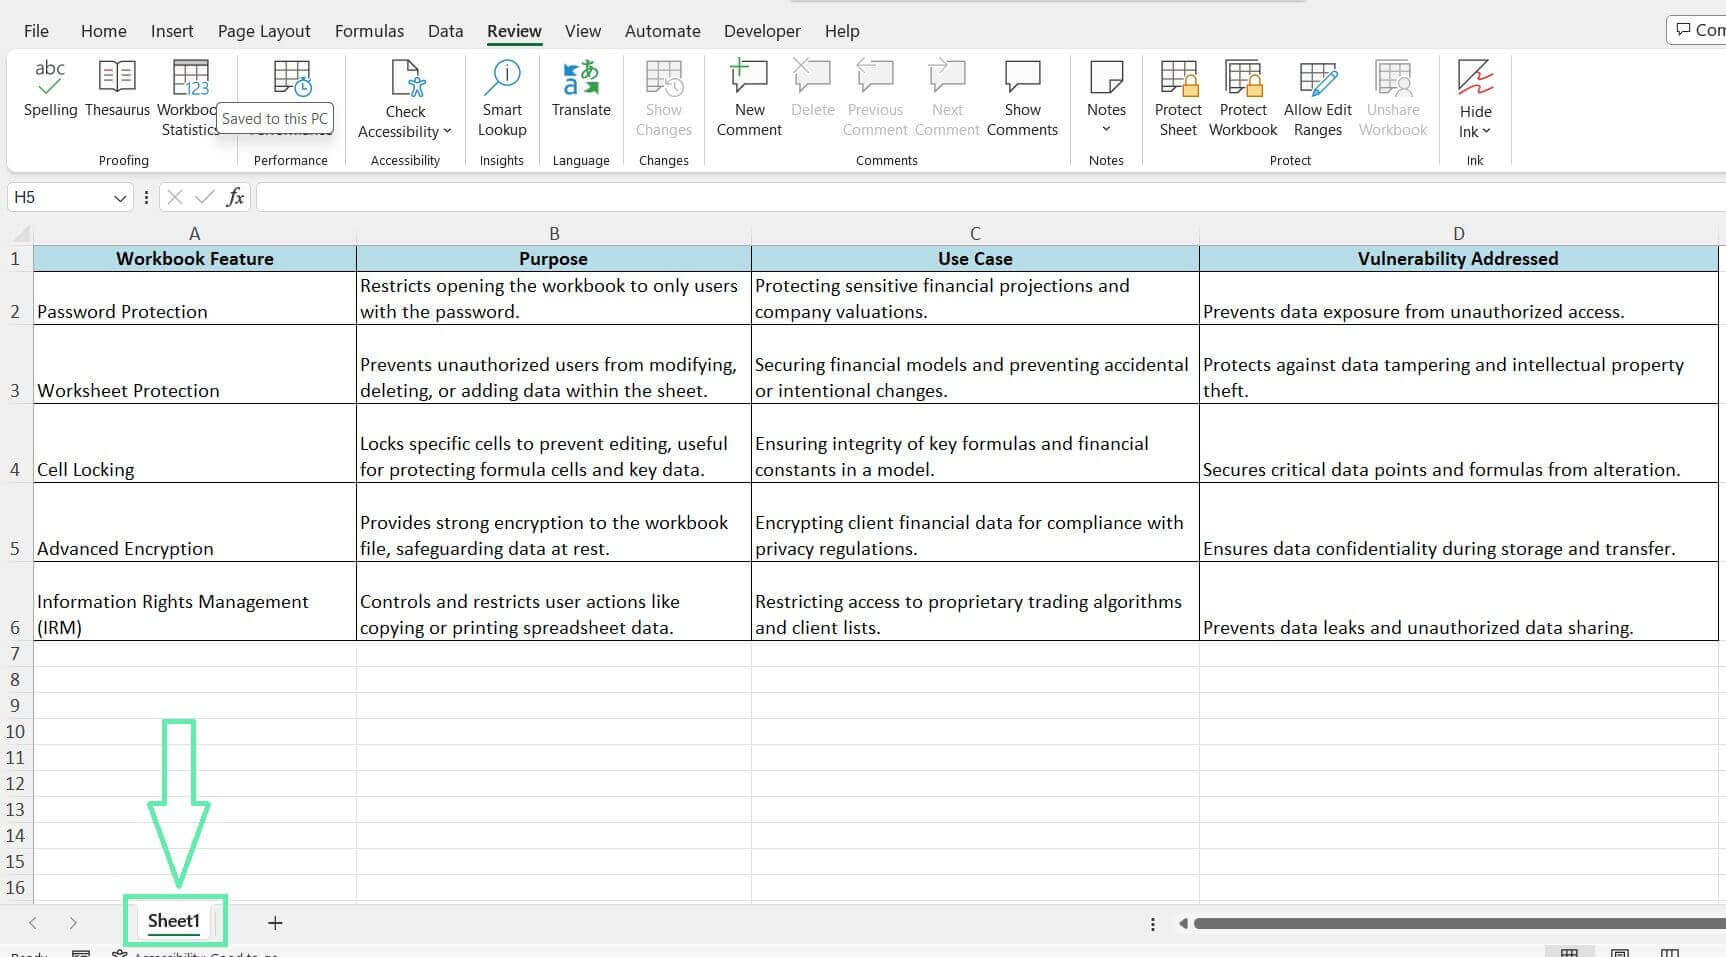
Step 2: Select the specific cells or ranges you want to lock.
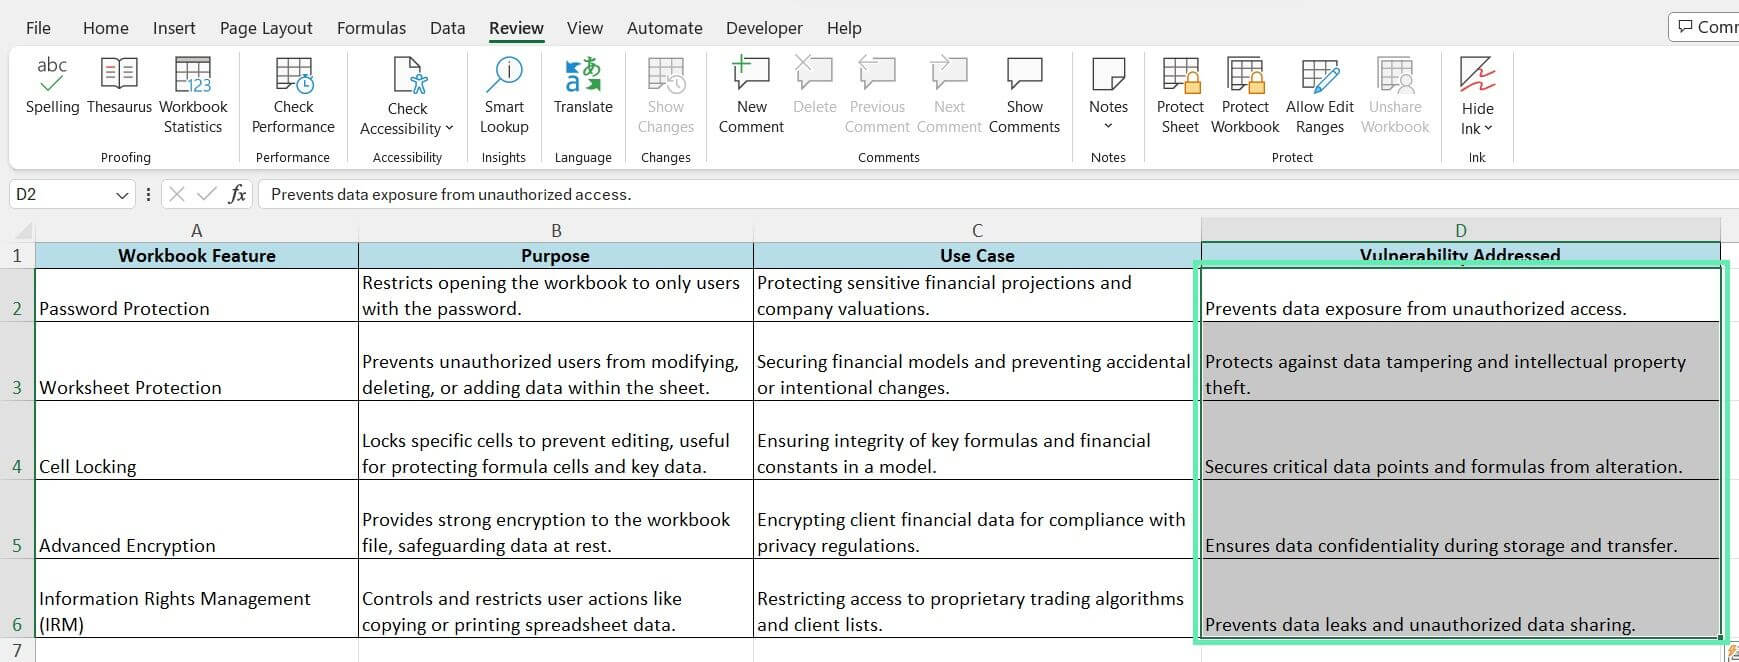
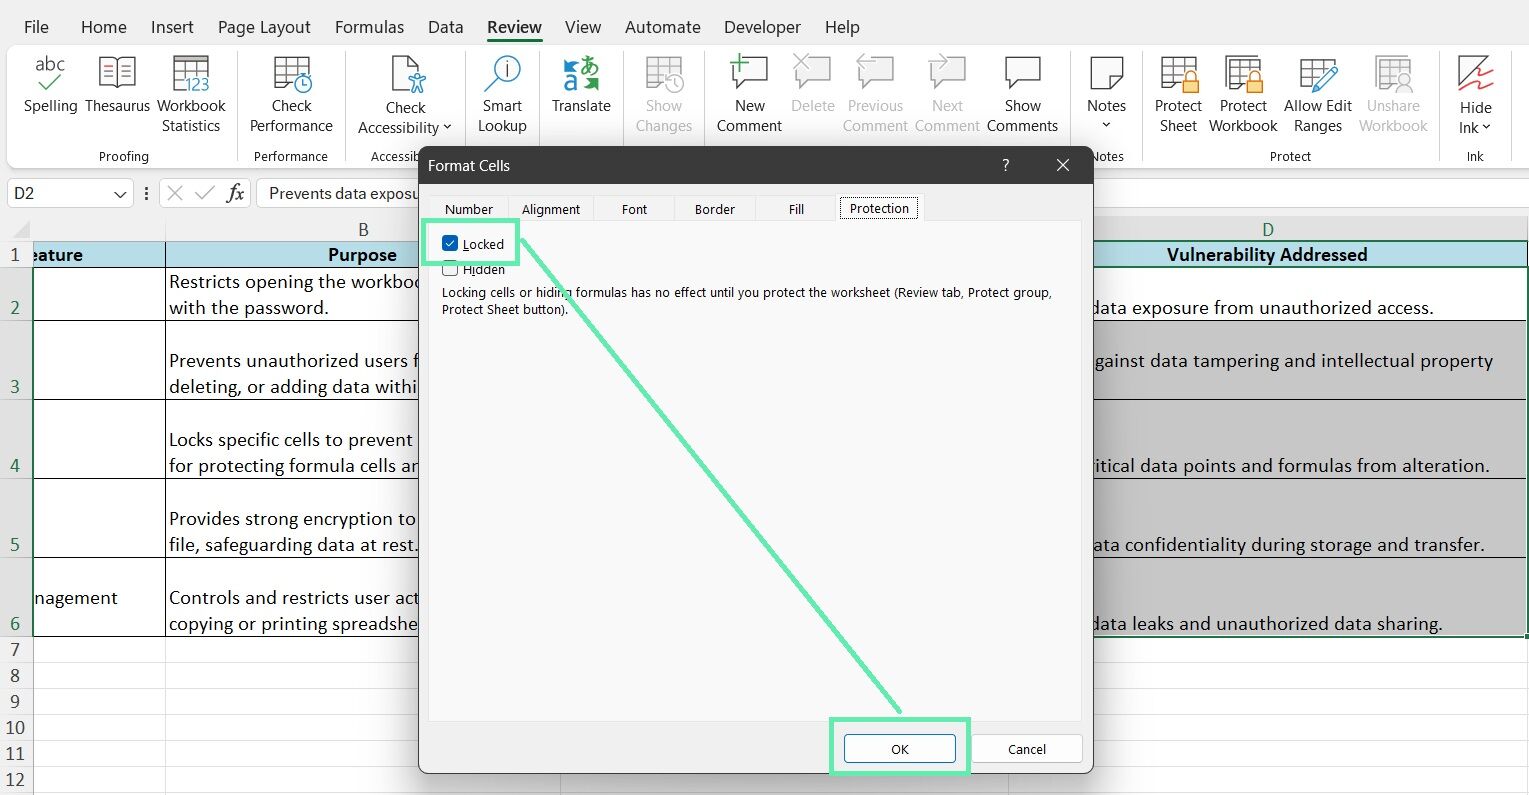
Step 3: Right-click and select ‘Format Cells’.
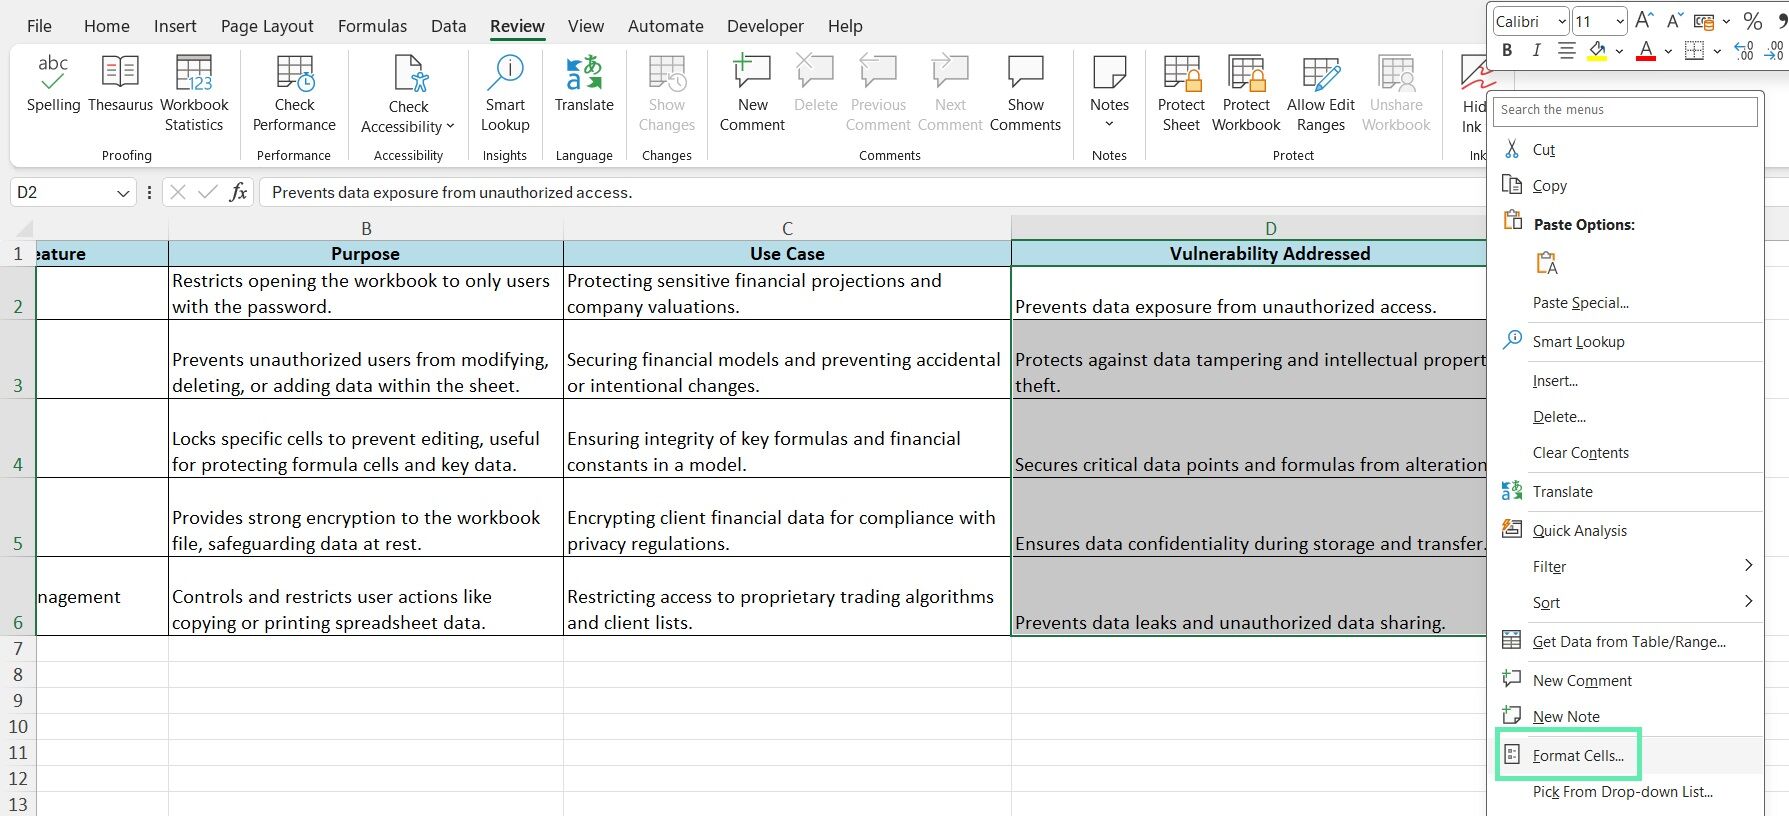
Step 4: Go to the ‘Protection’ tab.
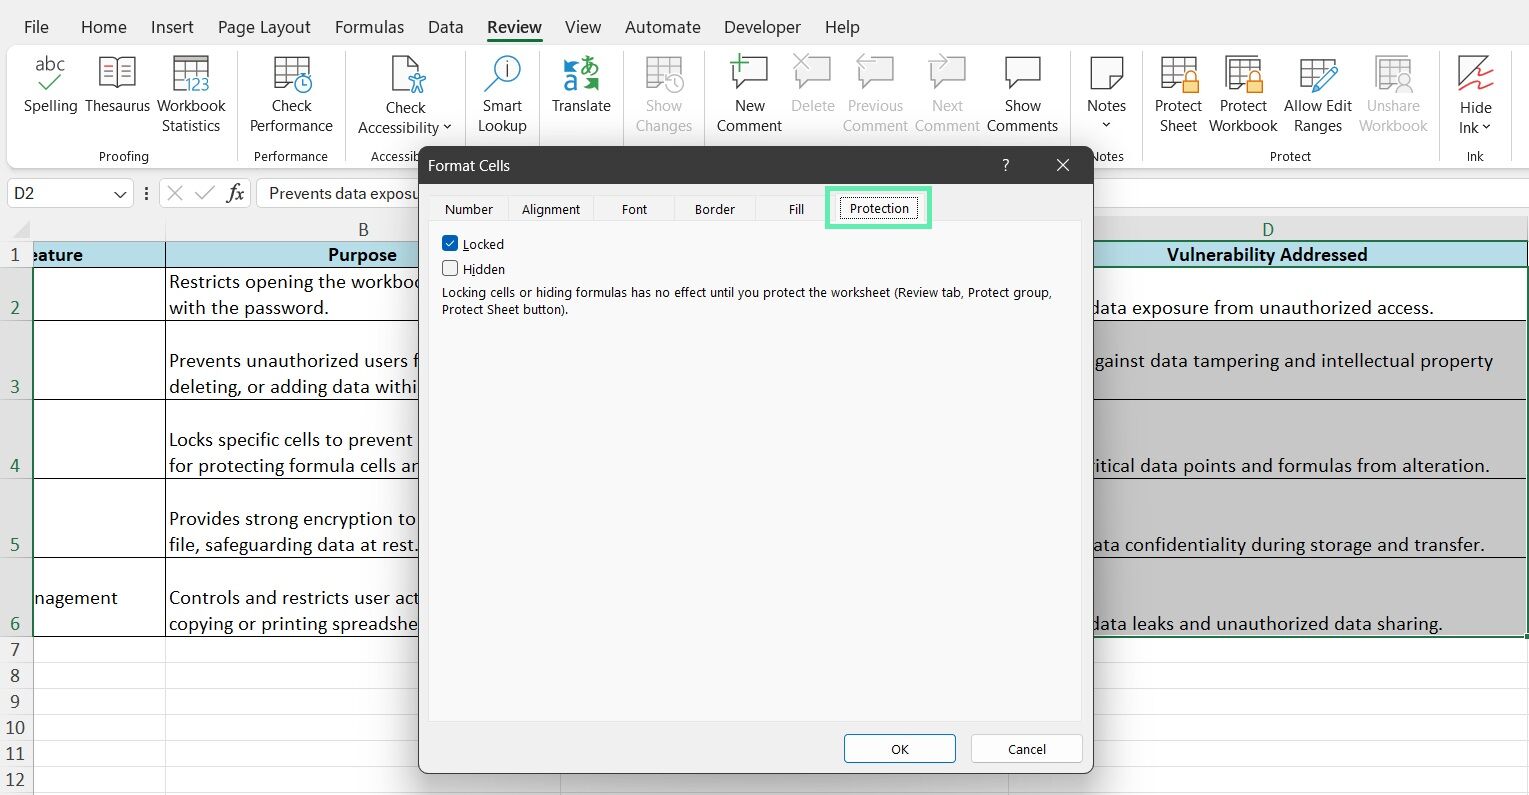
Step 5: Check the ‘Locked’ checkbox and click ‘OK’.
Follow the instructions provided in Method 2 to protect the worksheet.
Imagine you’ve developed a financial model for valuing a company based on discounted cash flow (DCF) analysis. The model relies on essential formulas and financial constants, such as discount and growth rate assumptions. By locking the said cells, you can ensure that users can input revenue and expense projections while preventing them from accidentally altering the underlying valuation methodology.
Cell locking protects the integrity of your financial models by preventing users from modifying critical formulas, assumptions, and constants. Such a feature guarantees the accuracy and dependability of your financial analysis, even when working collaboratively.
Method 4: Advanced Security Technique
While the security measures discussed so far provide a solid foundation, some situations may require more advanced techniques to protect your Excel workbooks. The following section will explore an advanced security feature called Information Rights Management (IRM).
Setting Permissions with Information Rights Management (IRM)
Excel workbooks can have restricted permissions even after sharing with Information Rights Management (IRM). You can control who can access, copy, print, or modify your files, protecting sensitive financial data. Here’s how to apply IRM settings:
Step 1: Open your Excel workbook.
Step 2: Click on the ‘File’ tab.
Step 3: Select ‘Info’ from the left-hand menu.

Step 4: Click the ‘Protect Workbook’ button.
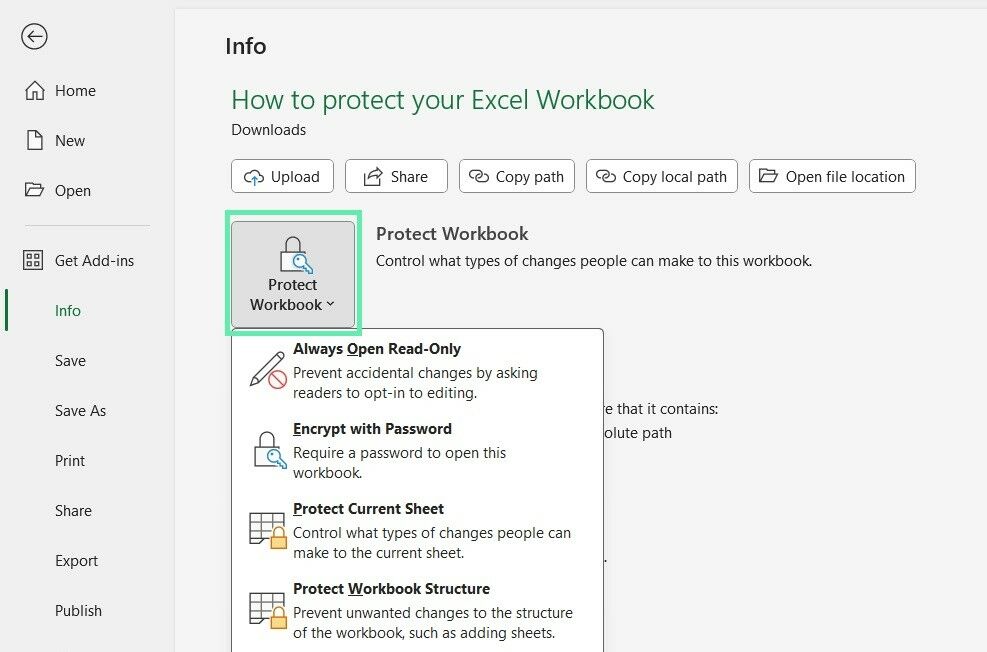
Step 5: Choose ‘Restrict Access’.
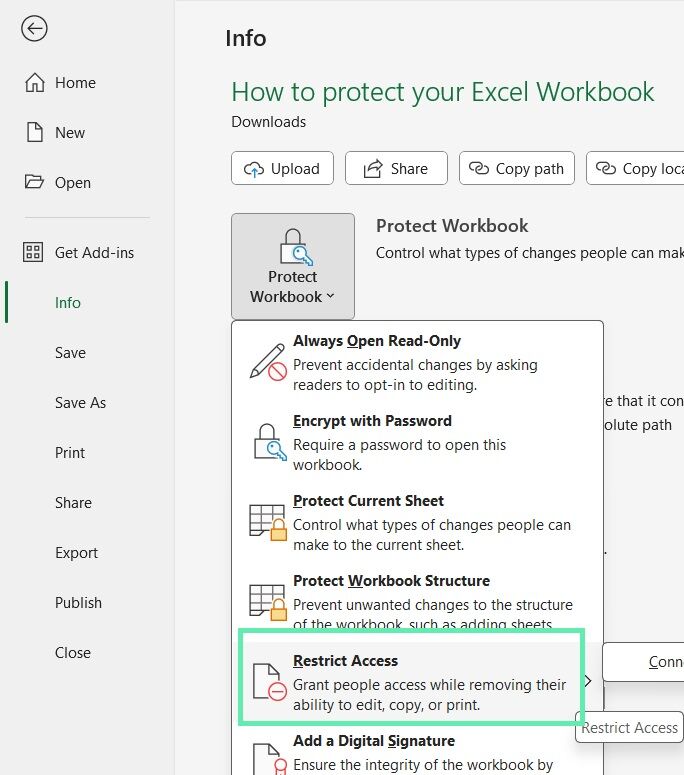
Step 6: Choose the desired permissions and restrictions, such as ‘Read-only access’ or ‘Disabling copying and printing’.
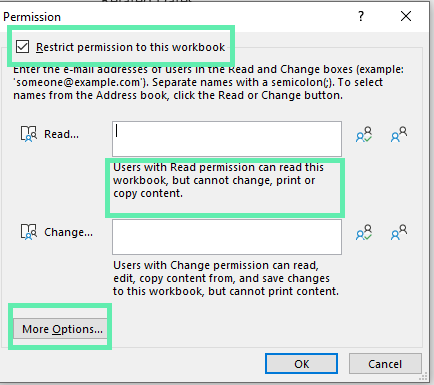
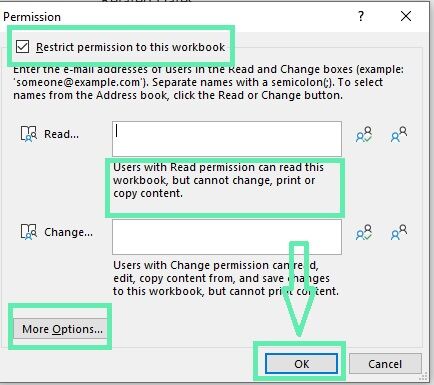
Step 7: Click ‘OK’ and save your workbook.
A message bar will appear once you assign permission levels, indicating that the workbook is rights-managed.
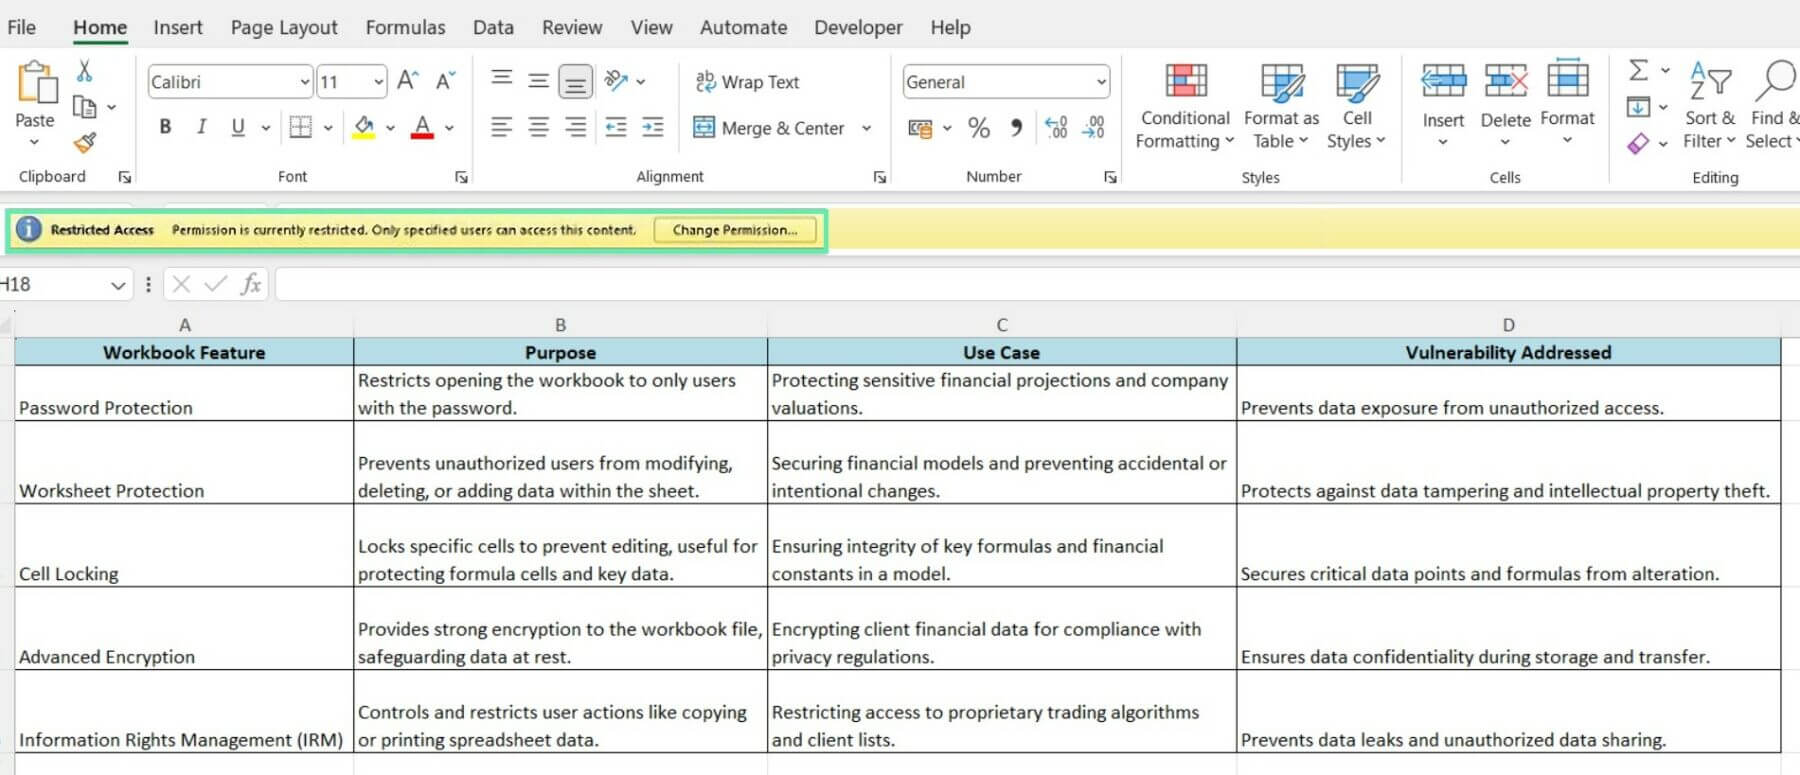
Imagine you’re an investment banker who has developed proprietary trading algorithms and maintains a confidential client list. By applying IRM settings to the Excel workbooks containing this Information, you can ensure that even if the files are inadvertently shared or leaked, unauthorized individuals cannot access, copy, or distribute the sensitive data. IRM allows you to maintain control over your intellectual property and client confidentiality.
IRM mitigates the risk of data leaks and unauthorized sharing of your Excel workbooks. Prevent unauthorized access by setting specific permissions and restrictions, such as disabling printing or copying sensitive financial Information.
Download Excel Template


